CONTENT
ここから
この節で学ぶこと
前回の 5-2 では、Flutterの基本レイアウトである Row と Column を使って、Discord風アプリの4カラム構造を作りました。
Row
├─ ServerRail
├─ ChannelSidebar
├─ ChatArea
└─ MemberPanel
今回の 5-3 では、その画面をFlutterアプリとして整えるために、次の3つを学びます。
MaterialApp
Scaffold
SafeArea
この3つは、Flutterアプリを作るときの土台になるWidgetです。
この節で一番大切なのは、次の一文です。
MaterialAppはアプリ全体の土台、Scaffoldは1画面の土台、SafeAreaは安全に表示するための余白を作る。
なぜ土台を整える必要があるのか
前回のコードでは、すでに画面を表示できました。
しかし、実際のアプリでは、ただWidgetを並べるだけでは不十分です。
たとえば、次のようなことを考える必要があります。
アプリ全体のテーマをどうするか
画面の背景色をどうするか
スマホのノッチやステータスバーに重ならないか
デバッグバナーを表示するか
画面全体の基本構造をどう作るか
これらを整えるために、Flutterでは MaterialApp、Scaffold、SafeArea を使います。
今回作る構造
この節では、前回作った4カラム構造を、次のようなアプリの土台の中に入れます。
DiscordLayoutPracticeApp
└─ MaterialApp
   └─ DiscordHomePage
      └─ Scaffold
         └─ SafeArea
            └─ Row
               ├─ ServerRail
               ├─ ChannelSidebar
               ├─ ChatArea
               └─ MemberPanel
この構造を見ると、Row よりも外側に、いくつかの大きな土台があることが分かります。
MaterialApp
↓
Scaffold
↓
SafeArea
↓
Row
順番に理解していきましょう。
MaterialAppとは何か
MaterialApp は、Flutterアプリ全体の設定をするWidgetです。
初心者向けには、次のように理解してください。
MaterialApp = アプリ全体の入口と基本設定をまとめるWidget
たとえば、次のような設定を行います。
最初に表示する画面
アプリのタイトル
テーマ
デバッグバナーを表示するかどうか
画面遷移の仕組み
今回のコードでは、次のように使います。
class DiscordLayoutPracticeApp extends StatelessWidget {
  const DiscordLayoutPracticeApp({super.key});

  @override
  Widget build(BuildContext context) {
    return const MaterialApp(
      debugShowCheckedModeBanner: false,
      home: DiscordHomePage(),
    );
  }
}
ここで大切なのは、home です。
home: DiscordHomePage(),
これは、「最初に表示する画面は DiscordHomePage です」という意味です。
debugShowCheckedModeBannerとは何か
Flutterアプリを開発中に実行すると、右上に DEBUG という赤いラベルが出ることがあります。
それを消す設定が、次の部分です。
debugShowCheckedModeBanner: false,
初心者向けには、次のように理解してください。
debugShowCheckedModeBanner: false
↓
右上のDEBUG表示を消す
教材やUI確認のときは、見た目を確認しやすくするために false にしておくと便利です。
Scaffoldとは何か
Scaffold は、1画面の基本構造を作るWidgetです。
初心者向けには、次のように理解してください。
Scaffold = 1つの画面の土台を作るWidget
Scaffold には、次のような要素を入れられます。
appBar
body
drawer
bottomNavigationBar
floatingActionButton
backgroundColor
今回のDiscord風アプリでは、主に body と backgroundColor を使います。
return const Scaffold(
  backgroundColor: DiscordColors.background,
  body: SafeArea(
    child: Row(
      children: [
        SizedBox(width: 72, child: ServerRail()),
        SizedBox(width: 240, child: ChannelSidebar()),
        Expanded(child: ChatArea()),
        SizedBox(width: 260, child: MemberPanel()),
      ],
    ),
  ),
);
ここで重要なのは、画面に表示したい中身を body に入れることです。
body: SafeArea(...)
Scaffoldのbodyとは何か
body は、画面のメイン部分です。
今回のDiscord風アプリでは、画面全体に4カラムUIを表示したいので、body に Row を入れます。
Scaffold
└─ body
   └─ Row
      ├─ ServerRail
      ├─ ChannelSidebar
      ├─ ChatArea
      └─ MemberPanel
つまり、Scaffold は画面全体の入れ物で、その中のメイン表示部分が body です。
SafeAreaとは何か
SafeArea は、スマホのステータスバー、ノッチ、ホームインジケーターなどにUIが重ならないようにしてくれるWidgetです。
初心者向けには、次のように理解してください。
SafeArea = 画面の危ない部分を避けて、安全な範囲に表示するWidget
たとえば、スマホには上部にステータスバーがあります。
時刻・電波・バッテリー表示
また、機種によってはノッチがあります。
画面上部のカメラ部分
SafeAreaを使わないと、文字やボタンがその部分に重なってしまうことがあります。
そこで、次のように使います。
SafeArea(
  child: Row(
    children: [
      ...
    ],
  ),
)
これにより、画面の安全な範囲にUIを表示できます。
SafeAreaはPCでも必要なのか
PCだけで動かす場合、SafeAreaの効果を強く感じないかもしれません。
しかし、Flutterはスマホアプリも作れるため、最初から SafeArea を入れておくと安全です。
特に今回のように、後でスマホ対応も行うアプリでは、早めに入れておくとよいです。
PC表示
↓
あまり変化を感じないこともある

スマホ表示
↓
ステータスバーやノッチを避けられる
まず最小コードで土台を確認する
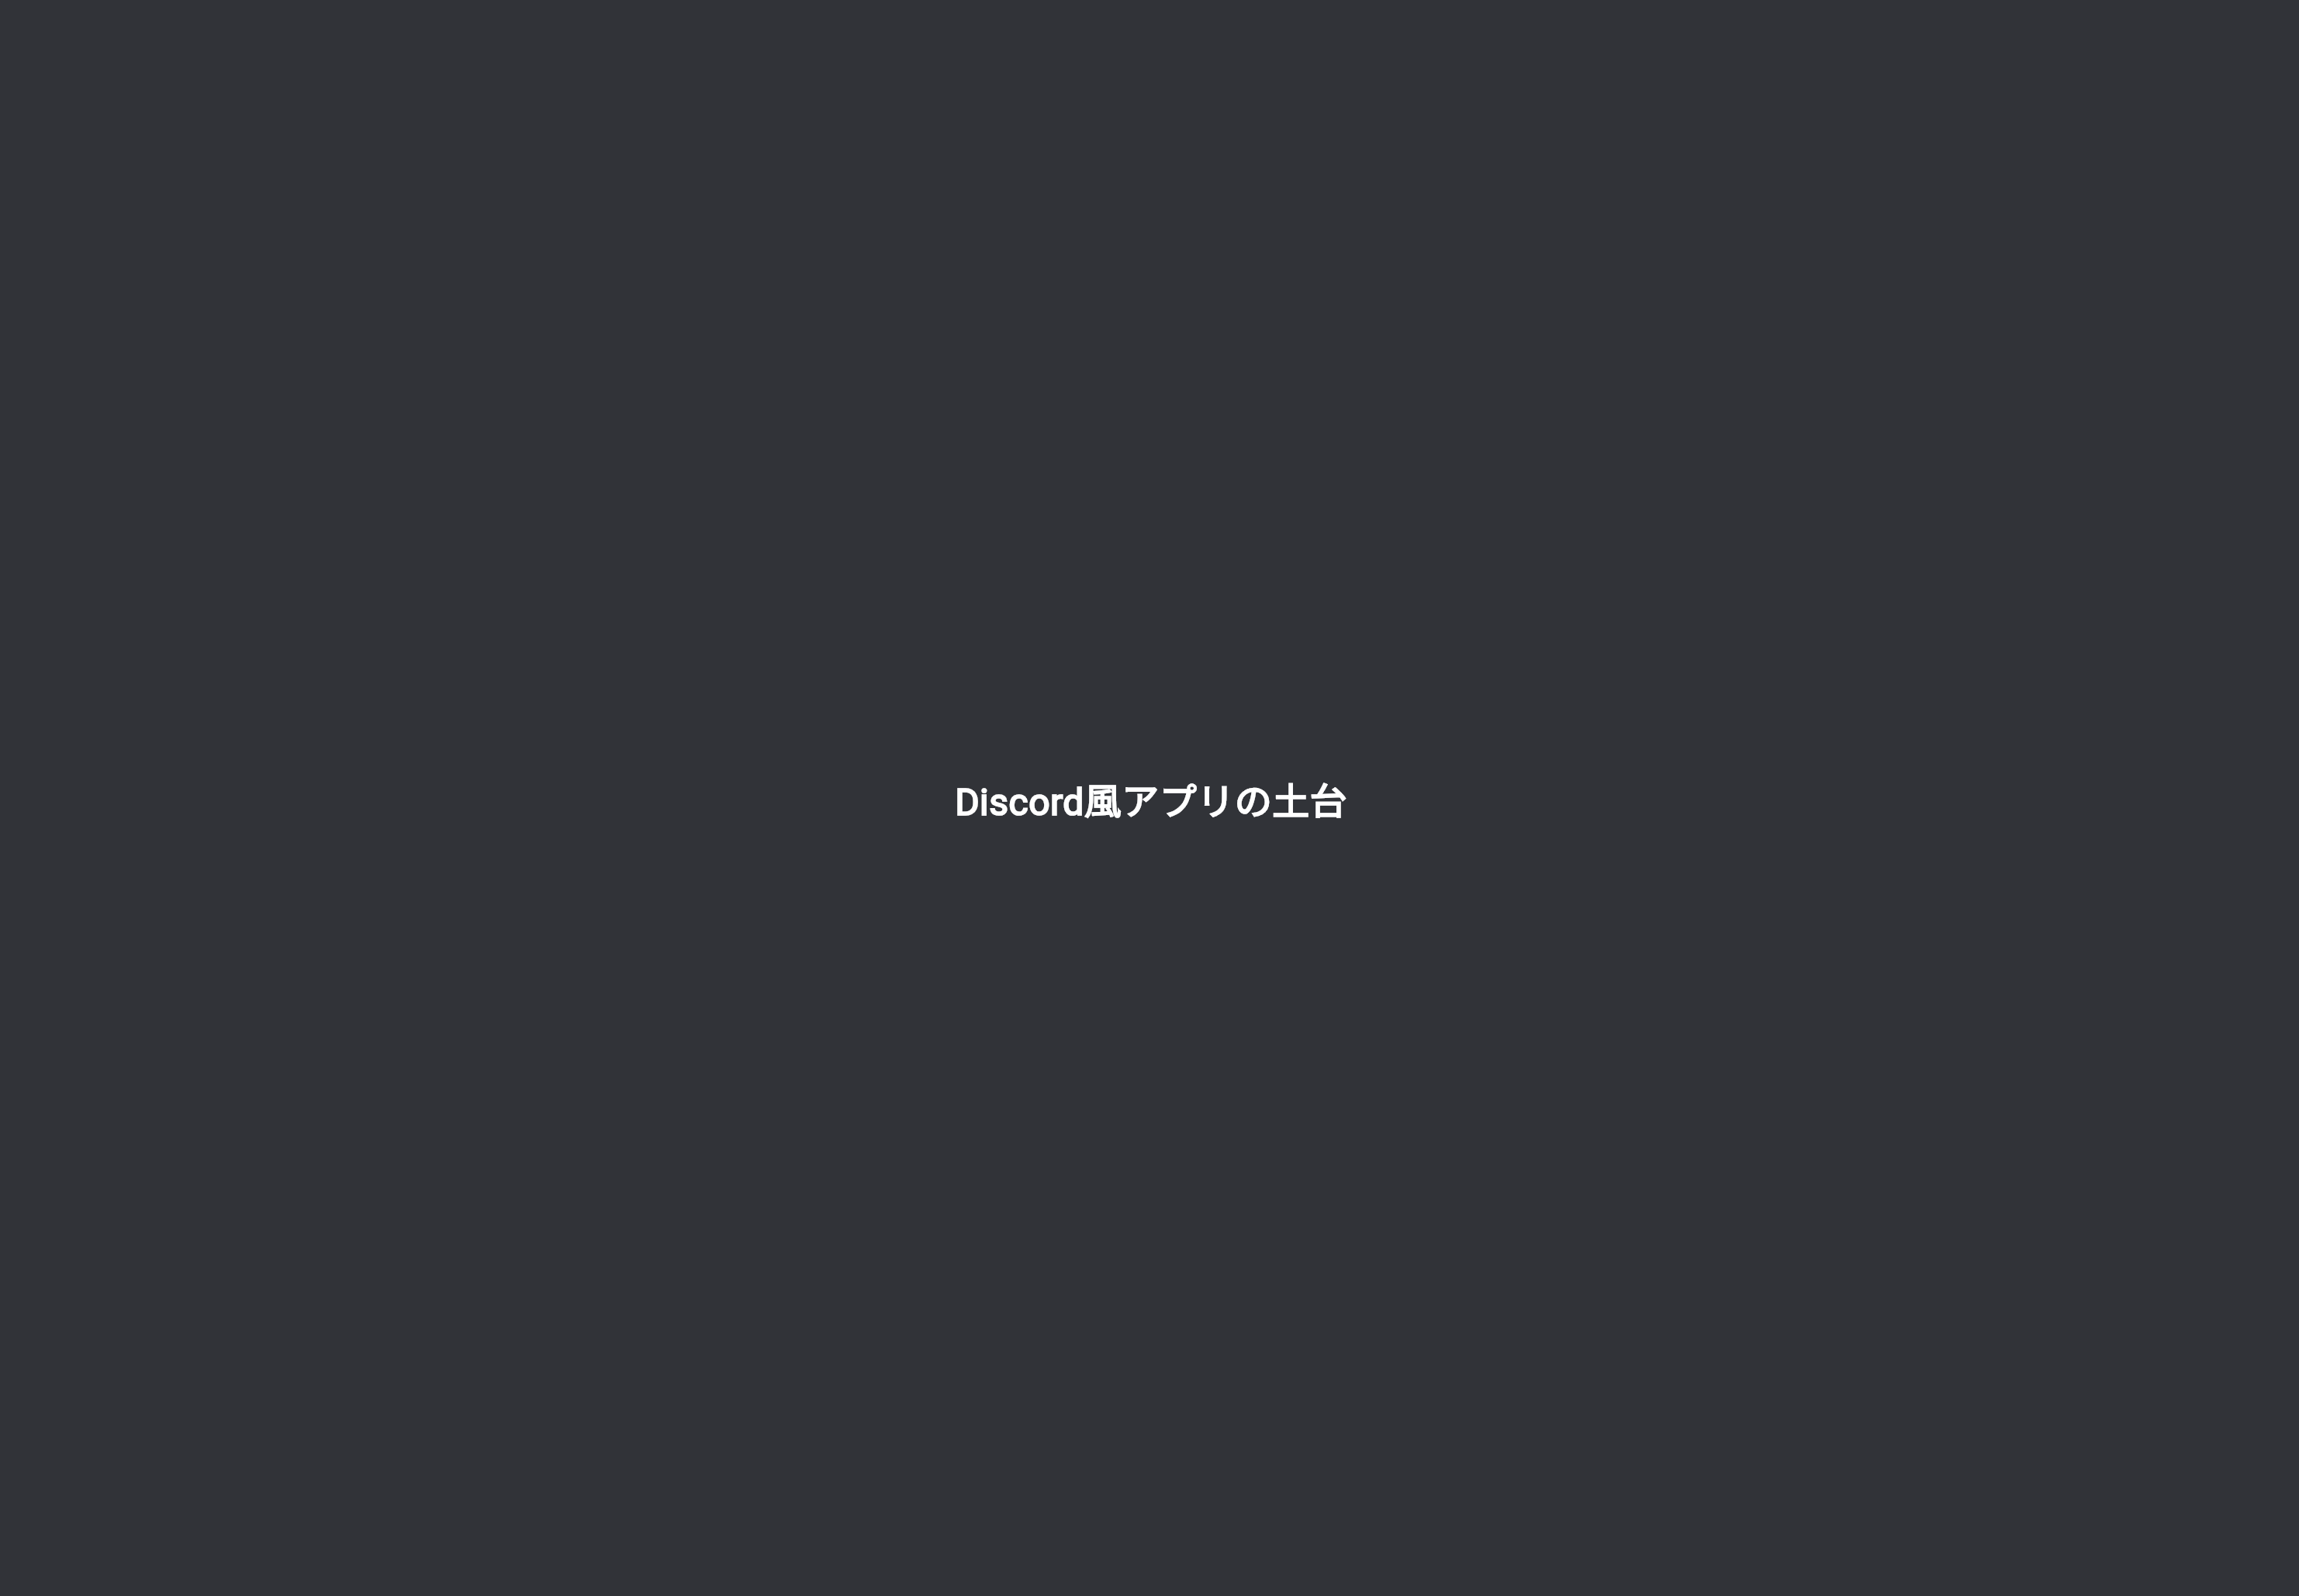
最初に、MaterialApp、Scaffold、SafeArea だけを使った最小コードを書いてみます。
DartPadまたはFlutterプロジェクトの main.dart に貼り付けてください。
import 'package:flutter/material.dart';

void main() {
  runApp(const DiscordBaseApp());
}

class DiscordBaseApp extends StatelessWidget {
  const DiscordBaseApp({super.key});

  @override
  Widget build(BuildContext context) {
    return const MaterialApp(
      debugShowCheckedModeBanner: false,
      home: DiscordBasePage(),
    );
  }
}

class DiscordBasePage extends StatelessWidget {
  const DiscordBasePage({super.key});

  @override
  Widget build(BuildContext context) {
    return const Scaffold(
      backgroundColor: Color(0xFF313338),
      body: SafeArea(
        child: Center(
          child: Text(
            'Discord風アプリの土台',
            style: TextStyle(
              color: Colors.white,
              fontSize: 24,
              fontWeight: FontWeight.bold,
            ),
          ),
        ),
      ),
    );
  }
}
実行して確認すること
実行すると、暗い背景の中央に文字が表示されます。
このコードでは、まだ4カラム構造はありません。
しかし、次の3つの土台はできています。
MaterialApp
Scaffold
SafeArea
まずは、この3つの関係を理解しましょう。
MaterialApp
↓
アプリ全体

Scaffold
↓
1画面の土台

SafeArea
↓
安全な表示領域
MaterialApp・Scaffold・SafeAreaの関係
3つの役割を表にすると、次のようになります。
| Widget | 役割 | 今回の使い方 |
|---|---|---|
MaterialApp | アプリ全体の設定 | 最初の画面、テーマ、デバッグ表示 |
Scaffold | 1画面の土台 | 背景色とbodyを指定 |
SafeArea | 安全な表示範囲を確保 | ステータスバーやノッチを避ける |
この3つは、Flutterアプリを作るときに非常によく出てきます。
Discord風カラーをまとめる
次に、背景色などを毎回直接書くのではなく、DiscordColors としてまとめます。
class DiscordColors {
  static const Color appRail = Color(0xFF1E1F22);
  static const Color sidebar = Color(0xFF2B2D31);
  static const Color background = Color(0xFF313338);
  static const Color memberPanel = Color(0xFF232428);
  static const Color input = Color(0xFF383A40);
  static const Color textPrimary = Color(0xFFF2F3F5);
  static const Color textMuted = Color(0xFF949BA4);
}
色をまとめておくと、あとから見たときに意味が分かりやすくなります。
backgroundColor: DiscordColors.background
これは、次のように読めます。
背景色にはDiscordColors.backgroundを使う
Color(0xFF313338) と直接書くよりも、意味が分かりやすいです。
4カラム構造を土台に入れる
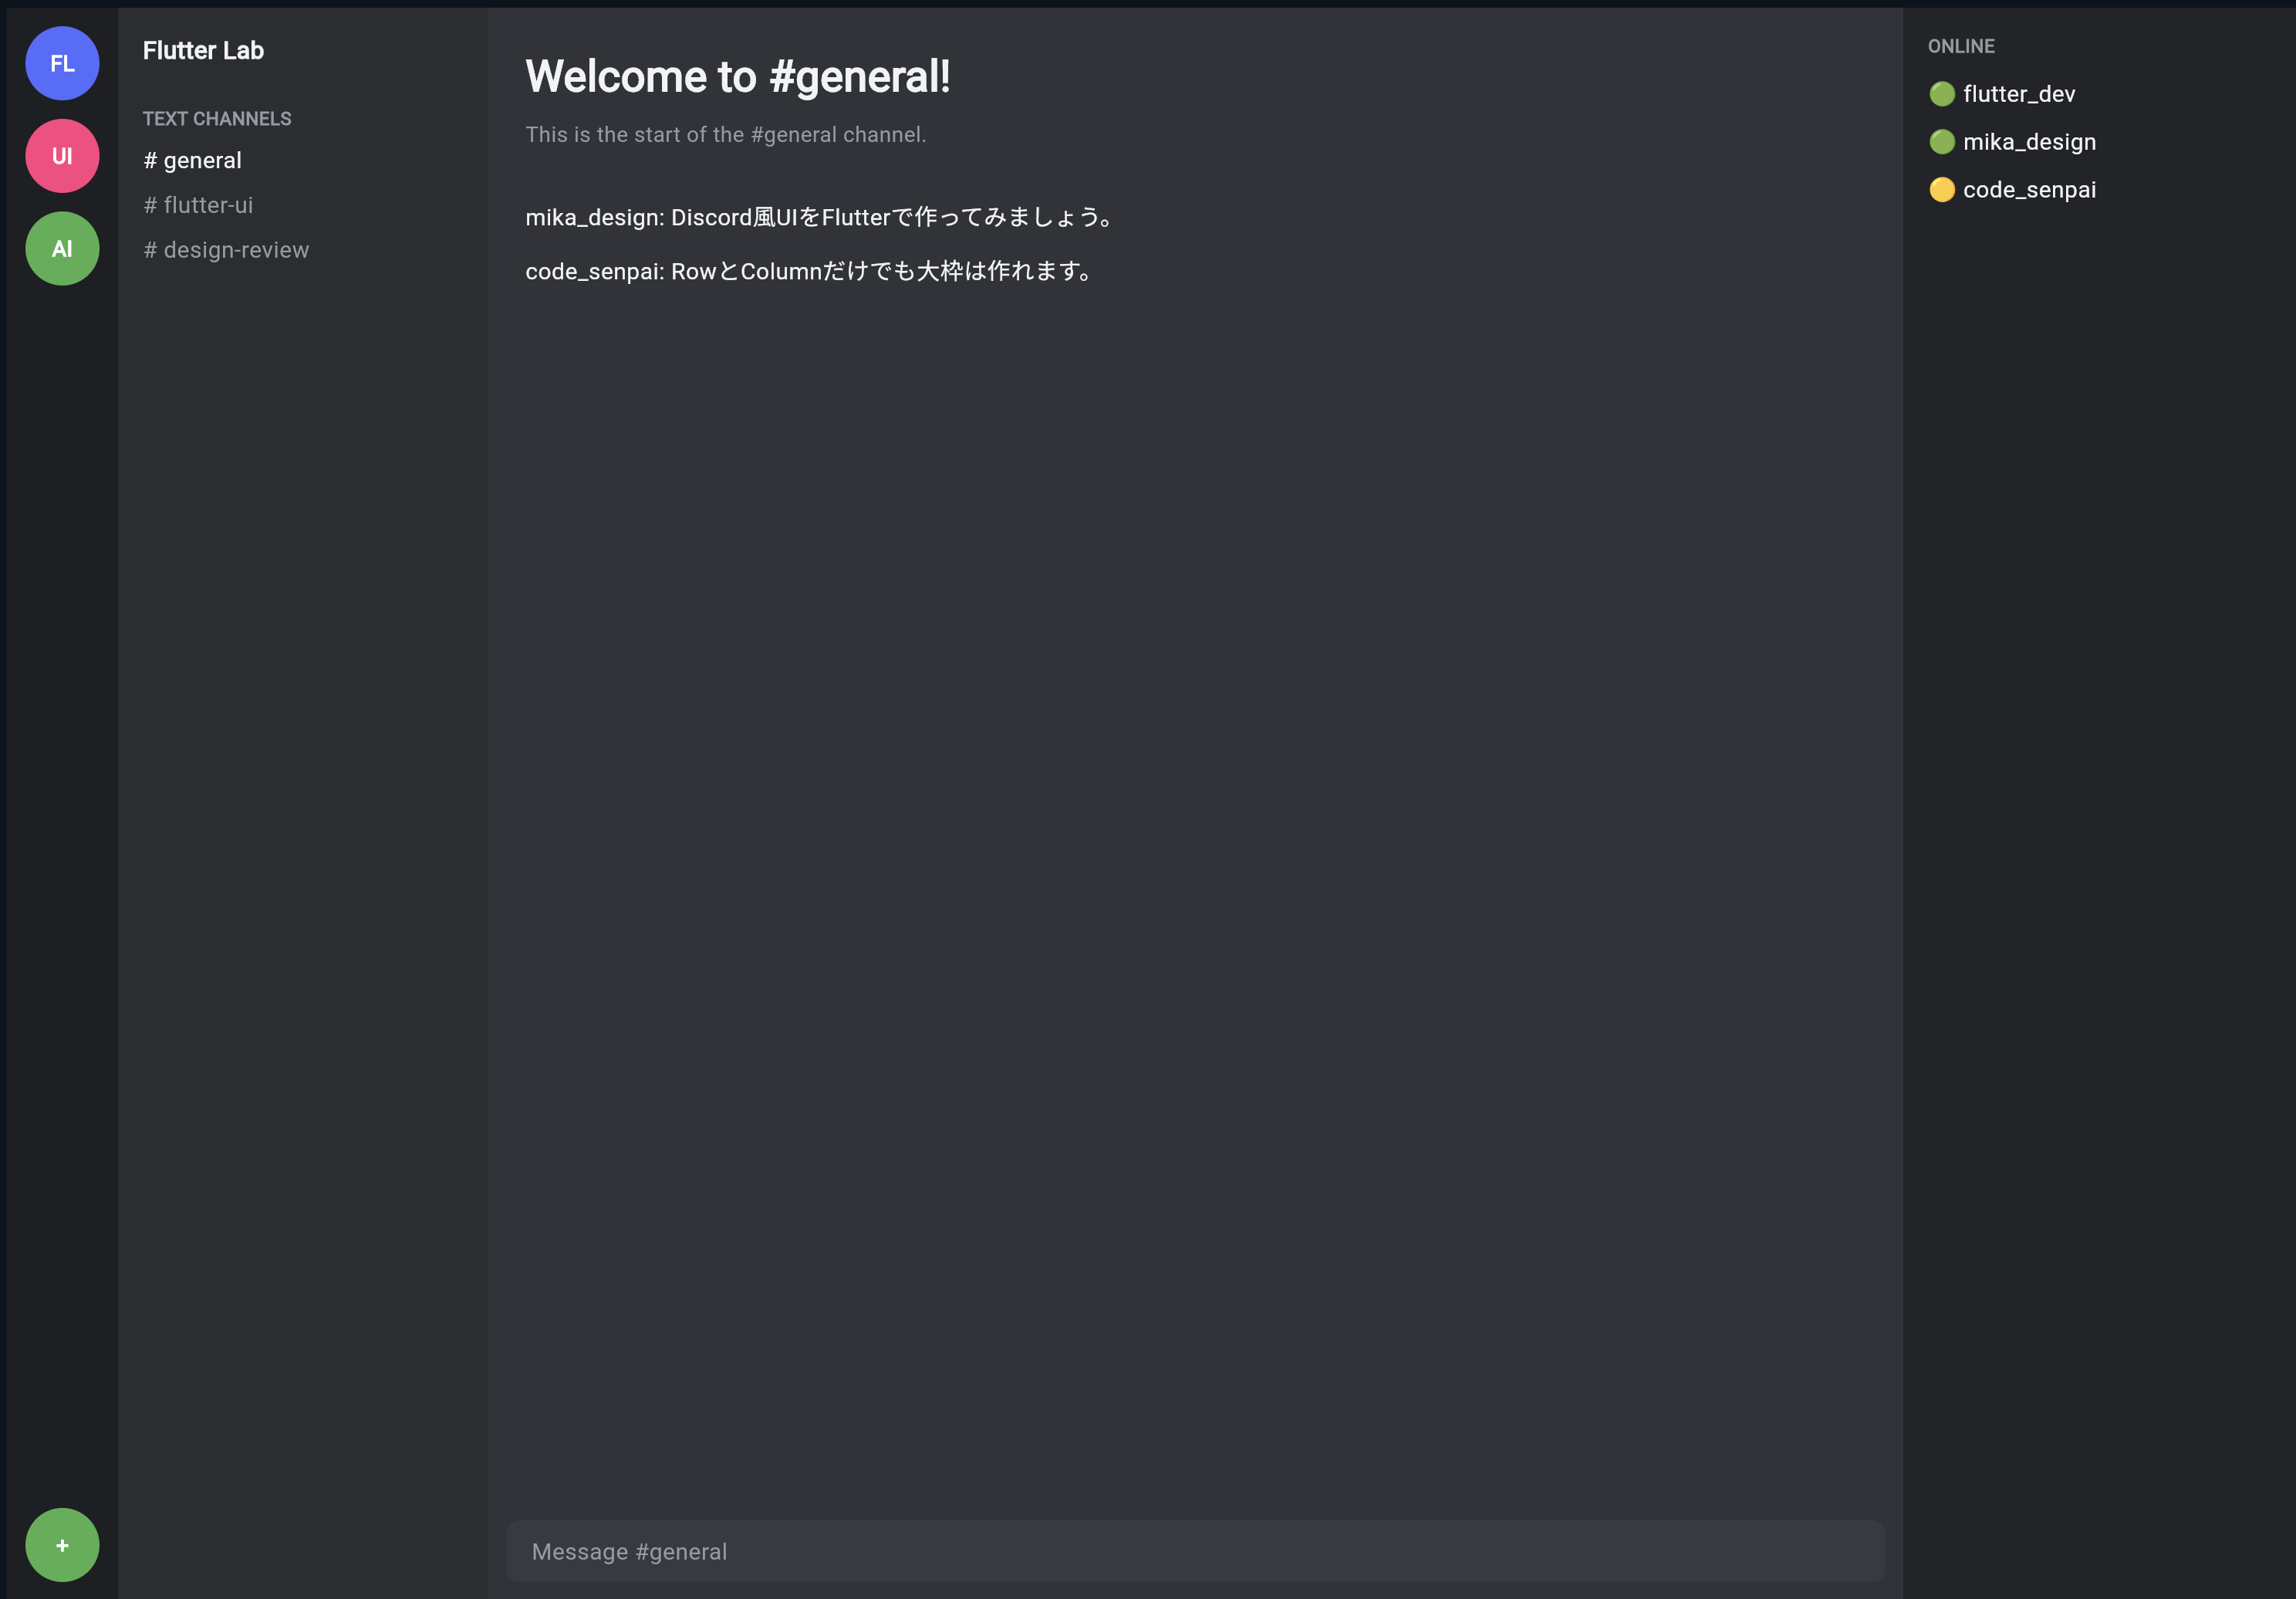
次に、前回作った4カラム構造を、MaterialApp、Scaffold、SafeArea の中に入れます。
import 'package:flutter/material.dart';

void main() {
  runApp(const DiscordBaseApp());
}

class DiscordBaseApp extends StatelessWidget {
  const DiscordBaseApp({super.key});

  @override
  Widget build(BuildContext context) {
    return const MaterialApp(
      debugShowCheckedModeBanner: false,
      home: DiscordBasePage(),
    );
  }
}

class DiscordColors {
  static const Color appRail = Color(0xFF1E1F22);
  static const Color sidebar = Color(0xFF2B2D31);
  static const Color background = Color(0xFF313338);
  static const Color memberPanel = Color(0xFF232428);
  static const Color input = Color(0xFF383A40);
  static const Color textPrimary = Color(0xFFF2F3F5);
  static const Color textMuted = Color(0xFF949BA4);
}

class DiscordBasePage extends StatelessWidget {
  const DiscordBasePage({super.key});

  @override
  Widget build(BuildContext context) {
    return const Scaffold(
      backgroundColor: DiscordColors.background,
      body: SafeArea(
        child: Row(
          children: [
            SizedBox(
              width: 72,
              child: ServerRail(),
            ),
            SizedBox(
              width: 240,
              child: ChannelSidebar(),
            ),
            Expanded(
              child: ChatArea(),
            ),
            SizedBox(
              width: 260,
              child: MemberPanel(),
            ),
          ],
        ),
      ),
    );
  }
}

class ServerRail extends StatelessWidget {
  const ServerRail({super.key});

  @override
  Widget build(BuildContext context) {
    return Container(
      color: DiscordColors.appRail,
      child: Column(
        children: [
          const SizedBox(height: 12),
          _serverIcon('FL', Colors.indigoAccent),
          const SizedBox(height: 12),
          _serverIcon('UI', Colors.pinkAccent),
          const SizedBox(height: 12),
          _serverIcon('AI', Colors.green),
          const Spacer(),
          _serverIcon('+', Colors.green),
          const SizedBox(height: 12),
        ],
      ),
    );
  }

  Widget _serverIcon(String label, Color color) {
    return Container(
      width: 48,
      height: 48,
      alignment: Alignment.center,
      decoration: BoxDecoration(
        color: color,
        shape: BoxShape.circle,
      ),
      child: Text(
        label,
        style: const TextStyle(
          color: Colors.white,
          fontWeight: FontWeight.bold,
        ),
      ),
    );
  }
}

class ChannelSidebar extends StatelessWidget {
  const ChannelSidebar({super.key});

  @override
  Widget build(BuildContext context) {
    return Container(
      color: DiscordColors.sidebar,
      child: const Column(
        crossAxisAlignment: CrossAxisAlignment.start,
        children: [
          SizedBox(height: 16),
          Padding(
            padding: EdgeInsets.symmetric(horizontal: 16),
            child: Text(
              'Flutter Lab',
              style: TextStyle(
                color: DiscordColors.textPrimary,
                fontSize: 16,
                fontWeight: FontWeight.bold,
              ),
            ),
          ),
          SizedBox(height: 24),
          Padding(
            padding: EdgeInsets.symmetric(horizontal: 16),
            child: Text(
              'TEXT CHANNELS',
              style: TextStyle(
                color: DiscordColors.textMuted,
                fontSize: 12,
                fontWeight: FontWeight.bold,
              ),
            ),
          ),
          SizedBox(height: 8),
          Padding(
            padding: EdgeInsets.symmetric(horizontal: 16),
            child: Text(
              '# general',
              style: TextStyle(
                color: DiscordColors.textPrimary,
                fontSize: 15,
              ),
            ),
          ),
          SizedBox(height: 8),
          Padding(
            padding: EdgeInsets.symmetric(horizontal: 16),
            child: Text(
              '# flutter-ui',
              style: TextStyle(
                color: DiscordColors.textMuted,
                fontSize: 15,
              ),
            ),
          ),
          SizedBox(height: 8),
          Padding(
            padding: EdgeInsets.symmetric(horizontal: 16),
            child: Text(
              '# design-review',
              style: TextStyle(
                color: DiscordColors.textMuted,
                fontSize: 15,
              ),
            ),
          ),
        ],
      ),
    );
  }
}

class ChatArea extends StatelessWidget {
  const ChatArea({super.key});

  @override
  Widget build(BuildContext context) {
    return Container(
      color: DiscordColors.background,
      child: Column(
        children: [
          Expanded(
            child: Container(
              padding: const EdgeInsets.all(24),
              alignment: Alignment.topLeft,
              child: const Column(
                crossAxisAlignment: CrossAxisAlignment.start,
                children: [
                  Text(
                    'Welcome to #general!',
                    style: TextStyle(
                      color: DiscordColors.textPrimary,
                      fontSize: 28,
                      fontWeight: FontWeight.bold,
                    ),
                  ),
                  SizedBox(height: 8),
                  Text(
                    'This is the start of the #general channel.',
                    style: TextStyle(
                      color: DiscordColors.textMuted,
                      fontSize: 14,
                    ),
                  ),
                  SizedBox(height: 32),
                  Text(
                    'mika_design: Discord風UIをFlutterで作ってみましょう。',
                    style: TextStyle(
                      color: DiscordColors.textPrimary,
                      fontSize: 15,
                    ),
                  ),
                  SizedBox(height: 12),
                  Text(
                    'code_senpai: RowとColumnだけでも大枠は作れます。',
                    style: TextStyle(
                      color: DiscordColors.textPrimary,
                      fontSize: 15,
                    ),
                  ),
                ],
              ),
            ),
          ),
          Container(
            height: 64,
            padding: const EdgeInsets.all(12),
            child: Container(
              alignment: Alignment.centerLeft,
              padding: const EdgeInsets.symmetric(horizontal: 16),
              decoration: const BoxDecoration(
                color: DiscordColors.input,
                borderRadius: BorderRadius.all(Radius.circular(8)),
              ),
              child: const Text(
                'Message #general',
                style: TextStyle(
                  color: DiscordColors.textMuted,
                  fontSize: 15,
                ),
              ),
            ),
          ),
        ],
      ),
    );
  }
}

class MemberPanel extends StatelessWidget {
  const MemberPanel({super.key});

  @override
  Widget build(BuildContext context) {
    return Container(
      color: DiscordColors.memberPanel,
      child: const Padding(
        padding: EdgeInsets.all(16),
        child: Column(
          crossAxisAlignment: CrossAxisAlignment.start,
          children: [
            Text(
              'ONLINE',
              style: TextStyle(
                color: DiscordColors.textMuted,
                fontSize: 12,
                fontWeight: FontWeight.bold,
              ),
            ),
            SizedBox(height: 12),
            Text(
              '🟢 flutter_dev',
              style: TextStyle(
                color: DiscordColors.textPrimary,
                fontSize: 15,
              ),
            ),
            SizedBox(height: 10),
            Text(
              '🟢 mika_design',
              style: TextStyle(
                color: DiscordColors.textPrimary,
                fontSize: 15,
              ),
            ),
            SizedBox(height: 10),
            Text(
              '🟡 code_senpai',
              style: TextStyle(
                color: DiscordColors.textPrimary,
                fontSize: 15,
              ),
            ),
          ],
        ),
      ),
    );
  }
}
実行して確認すること
このコードを実行すると、前回作った4カラム構造が、Flutterアプリの土台の中にきれいに入ります。
確認してほしいポイントは、次の3つです。
MaterialAppがアプリ全体を包んでいる
Scaffoldが1画面の土台になっている
SafeAreaの中に4カラムUIが入っている
構造で見ると、次のようになります。
MaterialApp
└─ Scaffold
   └─ SafeArea
      └─ Row
         ├─ ServerRail
         ├─ ChannelSidebar
         ├─ ChatArea
         └─ MemberPanel
この構造が、今後のDiscord風アプリの基本になります。
ThemeDataでアプリ全体の雰囲気を整える
次に、MaterialApp に theme を追加します。
theme は、アプリ全体の見た目の設定です。
たとえば、明るいテーマ・暗いテーマ・基本色・フォントなどを指定できます。
theme: ThemeData(
  useMaterial3: true,
  brightness: Brightness.dark,
  scaffoldBackgroundColor: DiscordColors.background,
),
これを入れると、アプリ全体をダークテーマとして扱いやすくなります。
ThemeDataを入れたMaterialApp
DiscordBaseApp を次のように変更します。
class DiscordBaseApp extends StatelessWidget {
  const DiscordBaseApp({super.key});

  @override
  Widget build(BuildContext context) {
    return MaterialApp(
      title: 'Discord Layout Practice',
      debugShowCheckedModeBanner: false,
      theme: ThemeData(
        useMaterial3: true,
        brightness: Brightness.dark,
        scaffoldBackgroundColor: DiscordColors.background,
        colorScheme: ColorScheme.fromSeed(
          seedColor: Color(0xFF5865F2),
          brightness: Brightness.dark,
        ),
      ),
      home: const DiscordBasePage(),
    );
  }
}
ここでは、const MaterialApp ではなくなっています。
理由は、ThemeData(...) や ColorScheme.fromSeed(...) を使っているためです。
ただし、home の DiscordBasePage() には const をつけられます。
titleとは何か
MaterialApp には、title を設定できます。
title: 'Discord Layout Practice',
これは、アプリの名前のようなものです。
Webやタスクスイッチャーなどで使われることがあります。
初心者のうちは、次のように理解してください。
title = アプリ名の設定
UIそのものに大きく表示されるわけではありませんが、アプリ全体の設定として入れておくとよいです。
useMaterial3とは何か
次の設定があります。
useMaterial3: true,
これは、FlutterのMaterial Design 3を使う設定です。
初心者向けには、次のように理解してください。
useMaterial3: true
↓
新しいMaterial Designの見た目・仕組みを使う
ただし、今回のDiscord風UIでは、多くの見た目を自分で作るので、この設定だけでDiscord風になるわけではありません。
brightnessとは何か
次の設定があります。
brightness: Brightness.dark,
これは、アプリ全体を暗いテーマとして扱う設定です。
Discord風アプリはダークUIなので、Brightness.dark が自然です。
Brightness.light
↓
明るいテーマ

Brightness.dark
↓
暗いテーマ
scaffoldBackgroundColorとは何か
次の設定があります。
scaffoldBackgroundColor: DiscordColors.background,
これは、Scaffold の基本背景色を指定する設定です。
もちろん、Scaffold 側でも次のように書けます。
backgroundColor: DiscordColors.background
ただし、アプリ全体で同じ背景色を使う場合は、ThemeData に入れておくと便利です。
SafeAreaを外すとどうなるか
試しに、SafeArea を外すとどうなるか考えてみましょう。
今のコードは次のようになっています。
body: SafeArea(
  child: Row(
    children: [
      ...
    ],
  ),
),
もしSafeAreaを外すと、次のようになります。
body: Row(
  children: [
    ...
  ],
),
PCでは大きな違いがないかもしれません。
しかし、スマホでは上部のステータスバーやノッチとUIが重なる可能性があります。
そのため、スマホ対応も考えるアプリでは、基本的に SafeArea を使うのが安全です。
さらにDiscord風にするためにAppBarは使わない
Scaffold には appBar を指定できます。
Scaffold(
  appBar: AppBar(
    title: Text('Discord'),
  ),
  body: ...
)
しかし、Discord風UIでは、一般的な上部AppBarよりも、独自のチャンネルバーを作るほうが自然です。
そのため、今回は appBar は使いません。
代わりに、後の節で ChatTopBar という独自の上部バーを作ります。
一般的なFlutterアプリ
↓
ScaffoldのappBarを使う

Discord風アプリ
↓
bodyの中に独自のChatTopBarを作る
このように、再現したいUIによって、Scaffoldの使い方も変わります。
ここまでの完成コード
今回の内容を整理したコードです。
import 'package:flutter/material.dart';

void main() {
  runApp(const DiscordBaseApp());
}

class DiscordBaseApp extends StatelessWidget {
  const DiscordBaseApp({super.key});

  @override
  Widget build(BuildContext context) {
    return MaterialApp(
      title: 'Discord Layout Practice',
      debugShowCheckedModeBanner: false,
      theme: ThemeData(
        useMaterial3: true,
        brightness: Brightness.dark,
        scaffoldBackgroundColor: DiscordColors.background,
        colorScheme: ColorScheme.fromSeed(
          seedColor: DiscordColors.blurple,
          brightness: Brightness.dark,
        ),
      ),
      home: const DiscordBasePage(),
    );
  }
}

class DiscordColors {
  static const Color appRail = Color(0xFF1E1F22);
  static const Color sidebar = Color(0xFF2B2D31);
  static const Color background = Color(0xFF313338);
  static const Color memberPanel = Color(0xFF232428);
  static const Color input = Color(0xFF383A40);
  static const Color textPrimary = Color(0xFFF2F3F5);
  static const Color textMuted = Color(0xFF949BA4);
  static const Color blurple = Color(0xFF5865F2);
}

class DiscordBasePage extends StatelessWidget {
  const DiscordBasePage({super.key});

  @override
  Widget build(BuildContext context) {
    return const Scaffold(
      backgroundColor: DiscordColors.background,
      body: SafeArea(
        child: Row(
          children: [
            SizedBox(
              width: 72,
              child: ServerRail(),
            ),
            SizedBox(
              width: 240,
              child: ChannelSidebar(),
            ),
            Expanded(
              child: ChatArea(),
            ),
            SizedBox(
              width: 260,
              child: MemberPanel(),
            ),
          ],
        ),
      ),
    );
  }
}

class ServerRail extends StatelessWidget {
  const ServerRail({super.key});

  @override
  Widget build(BuildContext context) {
    return Container(
      color: DiscordColors.appRail,
      child: Column(
        children: [
          const SizedBox(height: 12),
          _serverIcon('FL', Colors.indigoAccent),
          const SizedBox(height: 12),
          _serverIcon('UI', Colors.pinkAccent),
          const SizedBox(height: 12),
          _serverIcon('AI', Colors.green),
          const Spacer(),
          _serverIcon('+', Colors.green),
          const SizedBox(height: 12),
        ],
      ),
    );
  }

  Widget _serverIcon(String label, Color color) {
    return Container(
      width: 48,
      height: 48,
      alignment: Alignment.center,
      decoration: BoxDecoration(
        color: color,
        shape: BoxShape.circle,
      ),
      child: Text(
        label,
        style: const TextStyle(
          color: Colors.white,
          fontWeight: FontWeight.bold,
        ),
      ),
    );
  }
}

class ChannelSidebar extends StatelessWidget {
  const ChannelSidebar({super.key});

  @override
  Widget build(BuildContext context) {
    return Container(
      color: DiscordColors.sidebar,
      child: const Column(
        crossAxisAlignment: CrossAxisAlignment.start,
        children: [
          SizedBox(height: 16),
          Padding(
            padding: EdgeInsets.symmetric(horizontal: 16),
            child: Text(
              'Flutter Lab',
              style: TextStyle(
                color: DiscordColors.textPrimary,
                fontSize: 16,
                fontWeight: FontWeight.bold,
              ),
            ),
          ),
          SizedBox(height: 24),
          Padding(
            padding: EdgeInsets.symmetric(horizontal: 16),
            child: Text(
              'TEXT CHANNELS',
              style: TextStyle(
                color: DiscordColors.textMuted,
                fontSize: 12,
                fontWeight: FontWeight.bold,
              ),
            ),
          ),
          SizedBox(height: 8),
          Padding(
            padding: EdgeInsets.symmetric(horizontal: 16),
            child: Text(
              '# general',
              style: TextStyle(
                color: DiscordColors.textPrimary,
                fontSize: 15,
              ),
            ),
          ),
          SizedBox(height: 8),
          Padding(
            padding: EdgeInsets.symmetric(horizontal: 16),
            child: Text(
              '# flutter-ui',
              style: TextStyle(
                color: DiscordColors.textMuted,
                fontSize: 15,
              ),
            ),
          ),
          SizedBox(height: 8),
          Padding(
            padding: EdgeInsets.symmetric(horizontal: 16),
            child: Text(
              '# design-review',
              style: TextStyle(
                color: DiscordColors.textMuted,
                fontSize: 15,
              ),
            ),
          ),
        ],
      ),
    );
  }
}

class ChatArea extends StatelessWidget {
  const ChatArea({super.key});

  @override
  Widget build(BuildContext context) {
    return Container(
      color: DiscordColors.background,
      child: Column(
        children: [
          Expanded(
            child: Container(
              padding: const EdgeInsets.all(24),
              alignment: Alignment.topLeft,
              child: const Column(
                crossAxisAlignment: CrossAxisAlignment.start,
                children: [
                  Text(
                    'Welcome to #general!',
                    style: TextStyle(
                      color: DiscordColors.textPrimary,
                      fontSize: 28,
                      fontWeight: FontWeight.bold,
                    ),
                  ),
                  SizedBox(height: 8),
                  Text(
                    'This is the start of the #general channel.',
                    style: TextStyle(
                      color: DiscordColors.textMuted,
                      fontSize: 14,
                    ),
                  ),
                  SizedBox(height: 32),
                  Text(
                    'mika_design: Discord風UIをFlutterで作ってみましょう。',
                    style: TextStyle(
                      color: DiscordColors.textPrimary,
                      fontSize: 15,
                    ),
                  ),
                  SizedBox(height: 12),
                  Text(
                    'code_senpai: RowとColumnだけでも大枠は作れます。',
                    style: TextStyle(
                      color: DiscordColors.textPrimary,
                      fontSize: 15,
                    ),
                  ),
                ],
              ),
            ),
          ),
          Container(
            height: 64,
            padding: const EdgeInsets.all(12),
            child: Container(
              alignment: Alignment.centerLeft,
              padding: const EdgeInsets.symmetric(horizontal: 16),
              decoration: const BoxDecoration(
                color: DiscordColors.input,
                borderRadius: BorderRadius.all(Radius.circular(8)),
              ),
              child: const Text(
                'Message #general',
                style: TextStyle(
                  color: DiscordColors.textMuted,
                  fontSize: 15,
                ),
              ),
            ),
          ),
        ],
      ),
    );
  }
}

class MemberPanel extends StatelessWidget {
  const MemberPanel({super.key});

  @override
  Widget build(BuildContext context) {
    return Container(
      color: DiscordColors.memberPanel,
      child: const Padding(
        padding: EdgeInsets.all(16),
        child: Column(
          crossAxisAlignment: CrossAxisAlignment.start,
          children: [
            Text(
              'ONLINE',
              style: TextStyle(
                color: DiscordColors.textMuted,
                fontSize: 12,
                fontWeight: FontWeight.bold,
              ),
            ),
            SizedBox(height: 12),
            Text(
              '🟢 flutter_dev',
              style: TextStyle(
                color: DiscordColors.textPrimary,
                fontSize: 15,
              ),
            ),
            SizedBox(height: 10),
            Text(
              '🟢 mika_design',
              style: TextStyle(
                color: DiscordColors.textPrimary,
                fontSize: 15,
              ),
            ),
            SizedBox(height: 10),
            Text(
              '🟡 code_senpai',
              style: TextStyle(
                color: DiscordColors.textPrimary,
                fontSize: 15,
              ),
            ),
          ],
        ),
      ),
    );
  }
}
このコードで確認してほしいこと
実行したら、次の点を確認してください。
右上のDEBUGバナーが消えている
画面全体がダークテーマになっている
4カラム構造がSafeAreaの中に入っている
中央のChatAreaが残り幅を使っている
そして、コードの外側から内側への流れを確認してください。
main
↓
runApp
↓
DiscordBaseApp
↓
MaterialApp
↓
DiscordBasePage
↓
Scaffold
↓
SafeArea
↓
Row
↓
4つの領域
この流れが、Flutterアプリの基本です。
手を動かす練習1:DEBUGバナーを表示してみる
次の部分を探してください。
debugShowCheckedModeBanner: false,
これを一度 true にしてみます。
debugShowCheckedModeBanner: true,
右上にDEBUGバナーが表示されます。
確認できたら、また false に戻してください。
手を動かす練習2:背景色を変えてみる
DiscordColors.background を探してください。
static const Color background = Color(0xFF313338);
これを少し明るい色に変えてみます。
static const Color background = Color(0xFF3A3D44);
チャット画面の背景が少し変わります。
この練習で、色をclassにまとめるメリットが分かります。
手を動かす練習3:SafeAreaを外してみる
一度、次の SafeArea を外してみてください。
body: SafeArea(
  child: Row(
    children: [
      ...
    ],
  ),
),
次のように変更します。
body: Row(
  children: [
    ...
  ],
),
PCではあまり違いがないかもしれません。
しかし、スマホ表示ではステータスバーに重なる可能性があります。
確認したら、また SafeArea を戻してください。
手を動かす練習4:Scaffoldの背景色を変えてみる
Scaffold の背景色を変更してみましょう。
backgroundColor: DiscordColors.background,
たとえば、次のようにします。
backgroundColor: Colors.black,
ただし、今回の画面では各領域が背景色を持っているため、変化が分かりにくい場合があります。
これは、子Widgetの Container がそれぞれ色を持っているためです。
Scaffoldの背景
↓
画面全体の下地

Containerの背景
↓
各領域の色
よくあるつまずき1:MaterialAppとScaffoldの違いが分からない
初心者のうちは、MaterialApp と Scaffold の違いが分かりにくいです。
次のように覚えると分かりやすいです。
MaterialApp
↓
アプリ全体の設定

Scaffold
↓
1つの画面の土台
アプリには複数の画面を作ることがあります。
そのとき、MaterialApp はアプリ全体を包み、各画面ごとに Scaffold を使うイメージです。
よくあるつまずき2:SafeAreaをどこに置くか分からない
基本的には、Scaffold の body の中に置くと分かりやすいです。
Scaffold(
  body: SafeArea(
    child: ...
  ),
)
今回のように、画面全体のUIを安全な領域に入れたい場合は、この形で十分です。
よくあるつまずき3:constがつけられない
MaterialApp に ThemeData を入れると、const MaterialApp にできない場合があります。
return MaterialApp(
  theme: ThemeData(...),
  home: const DiscordBasePage(),
);
この場合は、MaterialApp の前の const を外せば大丈夫です。
一方、DiscordBasePage() のように固定で作れるWidgetには const をつけられます。
constでエラーになる
↓
無理につけなくてよい

つけられる場所
↓
つけるとパフォーマンスや読みやすさに少し良い
よくあるつまずき4:ScaffoldのappBarを使うべきか迷う
Flutterでは、画面上部にバーを作るときに appBar を使うことがあります。
しかし、Discord風UIのように独自デザインの上部バーを作りたい場合は、body の中に自分で作ることも多いです。
普通のアプリ
↓
ScaffoldのappBar

Discord風UI
↓
bodyの中でChatTopBarを作る
今回の教材では、Discord風の見た目を優先するため、appBar は使わず、後で独自の上部バーを作ります。
この節の確認問題
確認問題1
MaterialApp は何のために使いますか。
答え
アプリ全体の設定をするために使います。最初に表示する画面、テーマ、タイトル、デバッグバナーなどを設定できます。
確認問題2
Scaffold は何のために使いますか。
答え
1つの画面の土台を作るために使います。body、appBar、drawer、backgroundColor などを設定できます。
確認問題3
SafeArea は何のために使いますか。
答え
スマホのステータスバー、ノッチ、ホームインジケーターなどにUIが重ならないように、安全な表示領域を確保するために使います。
確認問題4
debugShowCheckedModeBanner: false は何をしていますか。
答え
画面右上に表示されるDEBUGバナーを非表示にしています。
確認問題5
今回、Scaffold の appBar を使わない理由は何ですか。
答え
Discord風UIでは、一般的なAppBarではなく、独自デザインの上部バーを作るほうが自然だからです。
この節のまとめ
この節では、Flutterアプリの土台となる MaterialApp、Scaffold、SafeArea を学びました。
それぞれの役割は、次の通りです。
MaterialApp
↓
アプリ全体の設定

Scaffold
↓
1画面の土台

SafeArea
↓
安全な表示範囲の確保
Discord風アプリの4カラム構造は、次のように土台の中に入れました。
MaterialApp
└─ Scaffold
   └─ SafeArea
      └─ Row
         ├─ ServerRail
         ├─ ChannelSidebar
         ├─ ChatArea
         └─ MemberPanel
この節で一番大切なのは、次の考え方です。
Flutterアプリは、MaterialAppで全体を作り、Scaffoldで1画面を作り、そのbodyの中に実際のUIを組み立てる。
次の節では、Discord風のダークUIをより作りやすくするために、色・余白・角丸などの見た目のルールを整理していきます。