CONTENT
ここから
この節で学ぶこと
前回の 5-5 では、Discord風アプリの左端に表示されるサーバー一覧UIを作りました。
ServerRail
└─ ServerIcon
今回の 5-6 では、その右側に表示されるチャンネル一覧UIを作ります。
Discord風の画面では、サーバーアイコンを選ぶと、そのサーバーの中にあるチャンネル一覧が表示されます。
左端
サーバー一覧

その右側
チャンネル一覧
チャンネル一覧には、主に次のような情報があります。
サーバー名
TEXT CHANNELS
# general
# flutter-ui
# design-review
VOICE CHANNELS
🔊 voice-lounge
🔊 pair-programming
下部のユーザー情報
この節で一番大切なのは、次の一文です。
チャンネル一覧は、カテゴリ見出しとチャンネル項目をColumnで縦に並べ、選択中のチャンネルだけ背景色を変えて作る。
今回作る部品
今回作る主なWidgetは、次の3つです。
| Widget名 | 役割 |
|---|---|
ChannelSidebar | チャンネル一覧全体 |
ChannelCategory | TEXT CHANNELS などのカテゴリ見出し |
ChannelTile | # general などのチャンネル1つ分 |
構造で見ると、次のようになります。
ChannelSidebar
├─ サーバー名エリア
├─ ChannelCategory
├─ ChannelTile
├─ ChannelTile
├─ ChannelTile
├─ ChannelCategory
├─ ChannelTile
└─ 下部ユーザー情報
今回も、いきなり完成形にせず、小さな部品に分けながら作ります。
チャンネル一覧を観察する
Discord風のチャンネル一覧には、いくつかの特徴があります。
サーバー名が上にある
テキストチャンネルとボイスチャンネルに分かれている
テキストチャンネルには # アイコンがつく
ボイスチャンネルには音声アイコンがつく
選択中のチャンネルには背景色がつく
未読チャンネルには小さな印がつく
下部には自分のユーザー情報が表示される
これをFlutterで作るために、次のように部品化します。
サーバー名
↓
Text

カテゴリ見出し
↓
ChannelCategory

チャンネル1つ分
↓
ChannelTile

下部ユーザー情報
↓
UserControlBar
この節では、まず ChannelSidebar、ChannelCategory、ChannelTile を中心に作ります。
テキストチャンネルとボイスチャンネル
Discordでは、チャンネルには種類があります。
今回は、2種類だけ扱います。
| 種類 | 例 | 表示 |
|---|---|---|
| テキストチャンネル | general | # general |
| ボイスチャンネル | voice-lounge | 音声アイコン + voice-lounge |
Flutterのコードでは、チャンネルの種類を enum で表します。
enum ChannelType {
  text,
  voice,
}
enumとは何か
enum は、決まった選択肢を表すための仕組みです。
初心者向けには、次のように理解してください。
enum = あらかじめ決まった種類を表すもの
今回のチャンネルは、text か voice のどちらかです。
enum ChannelType {
  text,
  voice,
}
これにより、次のように書けます。
type: ChannelType.text
または、
type: ChannelType.voice
文字列で 'text'、'voice' と書くこともできますが、enum を使うと打ち間違いを減らせます。
文字列の場合
'text'
'voice'
'voise' ← 間違えても気づきにくい

enumの場合
ChannelType.text
ChannelType.voice
チャンネル1つ分のデータを考える
まず、チャンネル1つ分に必要な情報を考えます。
| 情報 | 例 | 用途 |
|---|---|---|
| チャンネル名 | general | 表示名 |
| 種類 | text / voice | アイコン切り替え |
| 未読状態 | true / false | 小さな未読マーク |
これを DiscordChannel classにします。
class DiscordChannel {
  const DiscordChannel({
    required this.name,
    required this.type,
    this.unread = false,
  });

  final String name;
  final ChannelType type;
  final bool unread;
}
DiscordChannel classの意味
DiscordChannel は、チャンネル1つ分の設計図です。
DiscordChannel
├─ name
├─ type
└─ unread
たとえば、general というテキストチャンネルは、次のように作れます。
const DiscordChannel(
  name: 'general',
  type: ChannelType.text,
)
未読のチャンネルにしたい場合は、次のようにします。
const DiscordChannel(
  name: 'announcements',
  type: ChannelType.text,
  unread: true,
)
ボイスチャンネルは、次のように作れます。
const DiscordChannel(
  name: 'voice-lounge',
  type: ChannelType.voice,
)
チャンネルデータをListで持つ
チャンネルは複数あります。
そのため、List<DiscordChannel> として持ちます。
const channels = [
  DiscordChannel(name: 'general', type: ChannelType.text),
  DiscordChannel(name: 'flutter-ui', type: ChannelType.text),
  DiscordChannel(name: 'design-review', type: ChannelType.text),
  DiscordChannel(
    name: 'announcements',
    type: ChannelType.text,
    unread: true,
  ),
  DiscordChannel(name: 'voice-lounge', type: ChannelType.voice),
  DiscordChannel(name: 'pair-programming', type: ChannelType.voice),
];
このListをもとに、チャンネル一覧を作ります。
channels
↓
ChannelSidebar
↓
ChannelTileを複数表示
まずは最小のチャンネル一覧を作る
最初は、データclassやアイコン切り替えを入れずに、固定の文字だけでチャンネル一覧を作ってみます。
次のコードを main.dart に貼り付けてください。
import 'package:flutter/material.dart';

void main() {
  runApp(const ChannelSidebarPracticeApp());
}

class ChannelSidebarPracticeApp extends StatelessWidget {
  const ChannelSidebarPracticeApp({super.key});

  @override
  Widget build(BuildContext context) {
    return MaterialApp(
      title: 'Channel Sidebar Practice',
      debugShowCheckedModeBanner: false,
      theme: ThemeData(
        brightness: Brightness.dark,
        scaffoldBackgroundColor: DiscordColors.background,
      ),
      home: const ChannelSidebarPracticePage(),
    );
  }
}

class DiscordColors {
  static const Color sidebar = Color(0xFF2B2D31);
  static const Color background = Color(0xFF313338);
  static const Color selected = Color(0xFF404249);
  static const Color textPrimary = Color(0xFFF2F3F5);
  static const Color textMuted = Color(0xFF949BA4);
}

class DiscordSpacing {
  static const double xs = 4;
  static const double sm = 8;
  static const double md = 12;
  static const double lg = 16;
  static const double xl = 24;
}

class DiscordRadius {
  static const double sm = 6;
}

class ChannelSidebarPracticePage extends StatelessWidget {
  const ChannelSidebarPracticePage({super.key});

  @override
  Widget build(BuildContext context) {
    return const Scaffold(
      body: Row(
        children: [
          SizedBox(
            width: 250,
            child: ChannelSidebar(),
          ),
          Expanded(
            child: Center(
              child: Text(
                'ここにチャット画面が入ります',
                style: TextStyle(
                  color: DiscordColors.textPrimary,
                  fontSize: 24,
                  fontWeight: FontWeight.bold,
                ),
              ),
            ),
          ),
        ],
      ),
    );
  }
}

class ChannelSidebar extends StatelessWidget {
  const ChannelSidebar({super.key});

  @override
  Widget build(BuildContext context) {
    return Container(
      color: DiscordColors.sidebar,
      child: const Column(
        crossAxisAlignment: CrossAxisAlignment.start,
        children: [
          SizedBox(height: DiscordSpacing.lg),
          Padding(
            padding: EdgeInsets.symmetric(horizontal: DiscordSpacing.lg),
            child: Text(
              'Flutter Lab',
              style: TextStyle(
                color: DiscordColors.textPrimary,
                fontSize: 16,
                fontWeight: FontWeight.bold,
              ),
            ),
          ),
          SizedBox(height: DiscordSpacing.xl),
          Padding(
            padding: EdgeInsets.symmetric(horizontal: DiscordSpacing.lg),
            child: Text(
              'TEXT CHANNELS',
              style: TextStyle(
                color: DiscordColors.textMuted,
                fontSize: 12,
                fontWeight: FontWeight.bold,
              ),
            ),
          ),
          SizedBox(height: DiscordSpacing.sm),
          Padding(
            padding: EdgeInsets.symmetric(horizontal: DiscordSpacing.lg),
            child: Text(
              '# general',
              style: TextStyle(
                color: DiscordColors.textPrimary,
                fontSize: 15,
              ),
            ),
          ),
          SizedBox(height: DiscordSpacing.sm),
          Padding(
            padding: EdgeInsets.symmetric(horizontal: DiscordSpacing.lg),
            child: Text(
              '# flutter-ui',
              style: TextStyle(
                color: DiscordColors.textMuted,
                fontSize: 15,
              ),
            ),
          ),
          SizedBox(height: DiscordSpacing.sm),
          Padding(
            padding: EdgeInsets.symmetric(horizontal: DiscordSpacing.lg),
            child: Text(
              '# design-review',
              style: TextStyle(
                color: DiscordColors.textMuted,
                fontSize: 15,
              ),
            ),
          ),
          SizedBox(height: DiscordSpacing.xl),
          Padding(
            padding: EdgeInsets.symmetric(horizontal: DiscordSpacing.lg),
            child: Text(
              'VOICE CHANNELS',
              style: TextStyle(
                color: DiscordColors.textMuted,
                fontSize: 12,
                fontWeight: FontWeight.bold,
              ),
            ),
          ),
          SizedBox(height: DiscordSpacing.sm),
          Padding(
            padding: EdgeInsets.symmetric(horizontal: DiscordSpacing.lg),
            child: Text(
              '🔊 voice-lounge',
              style: TextStyle(
                color: DiscordColors.textMuted,
                fontSize: 15,
              ),
            ),
          ),
        ],
      ),
    );
  }
}
実行して確認すること
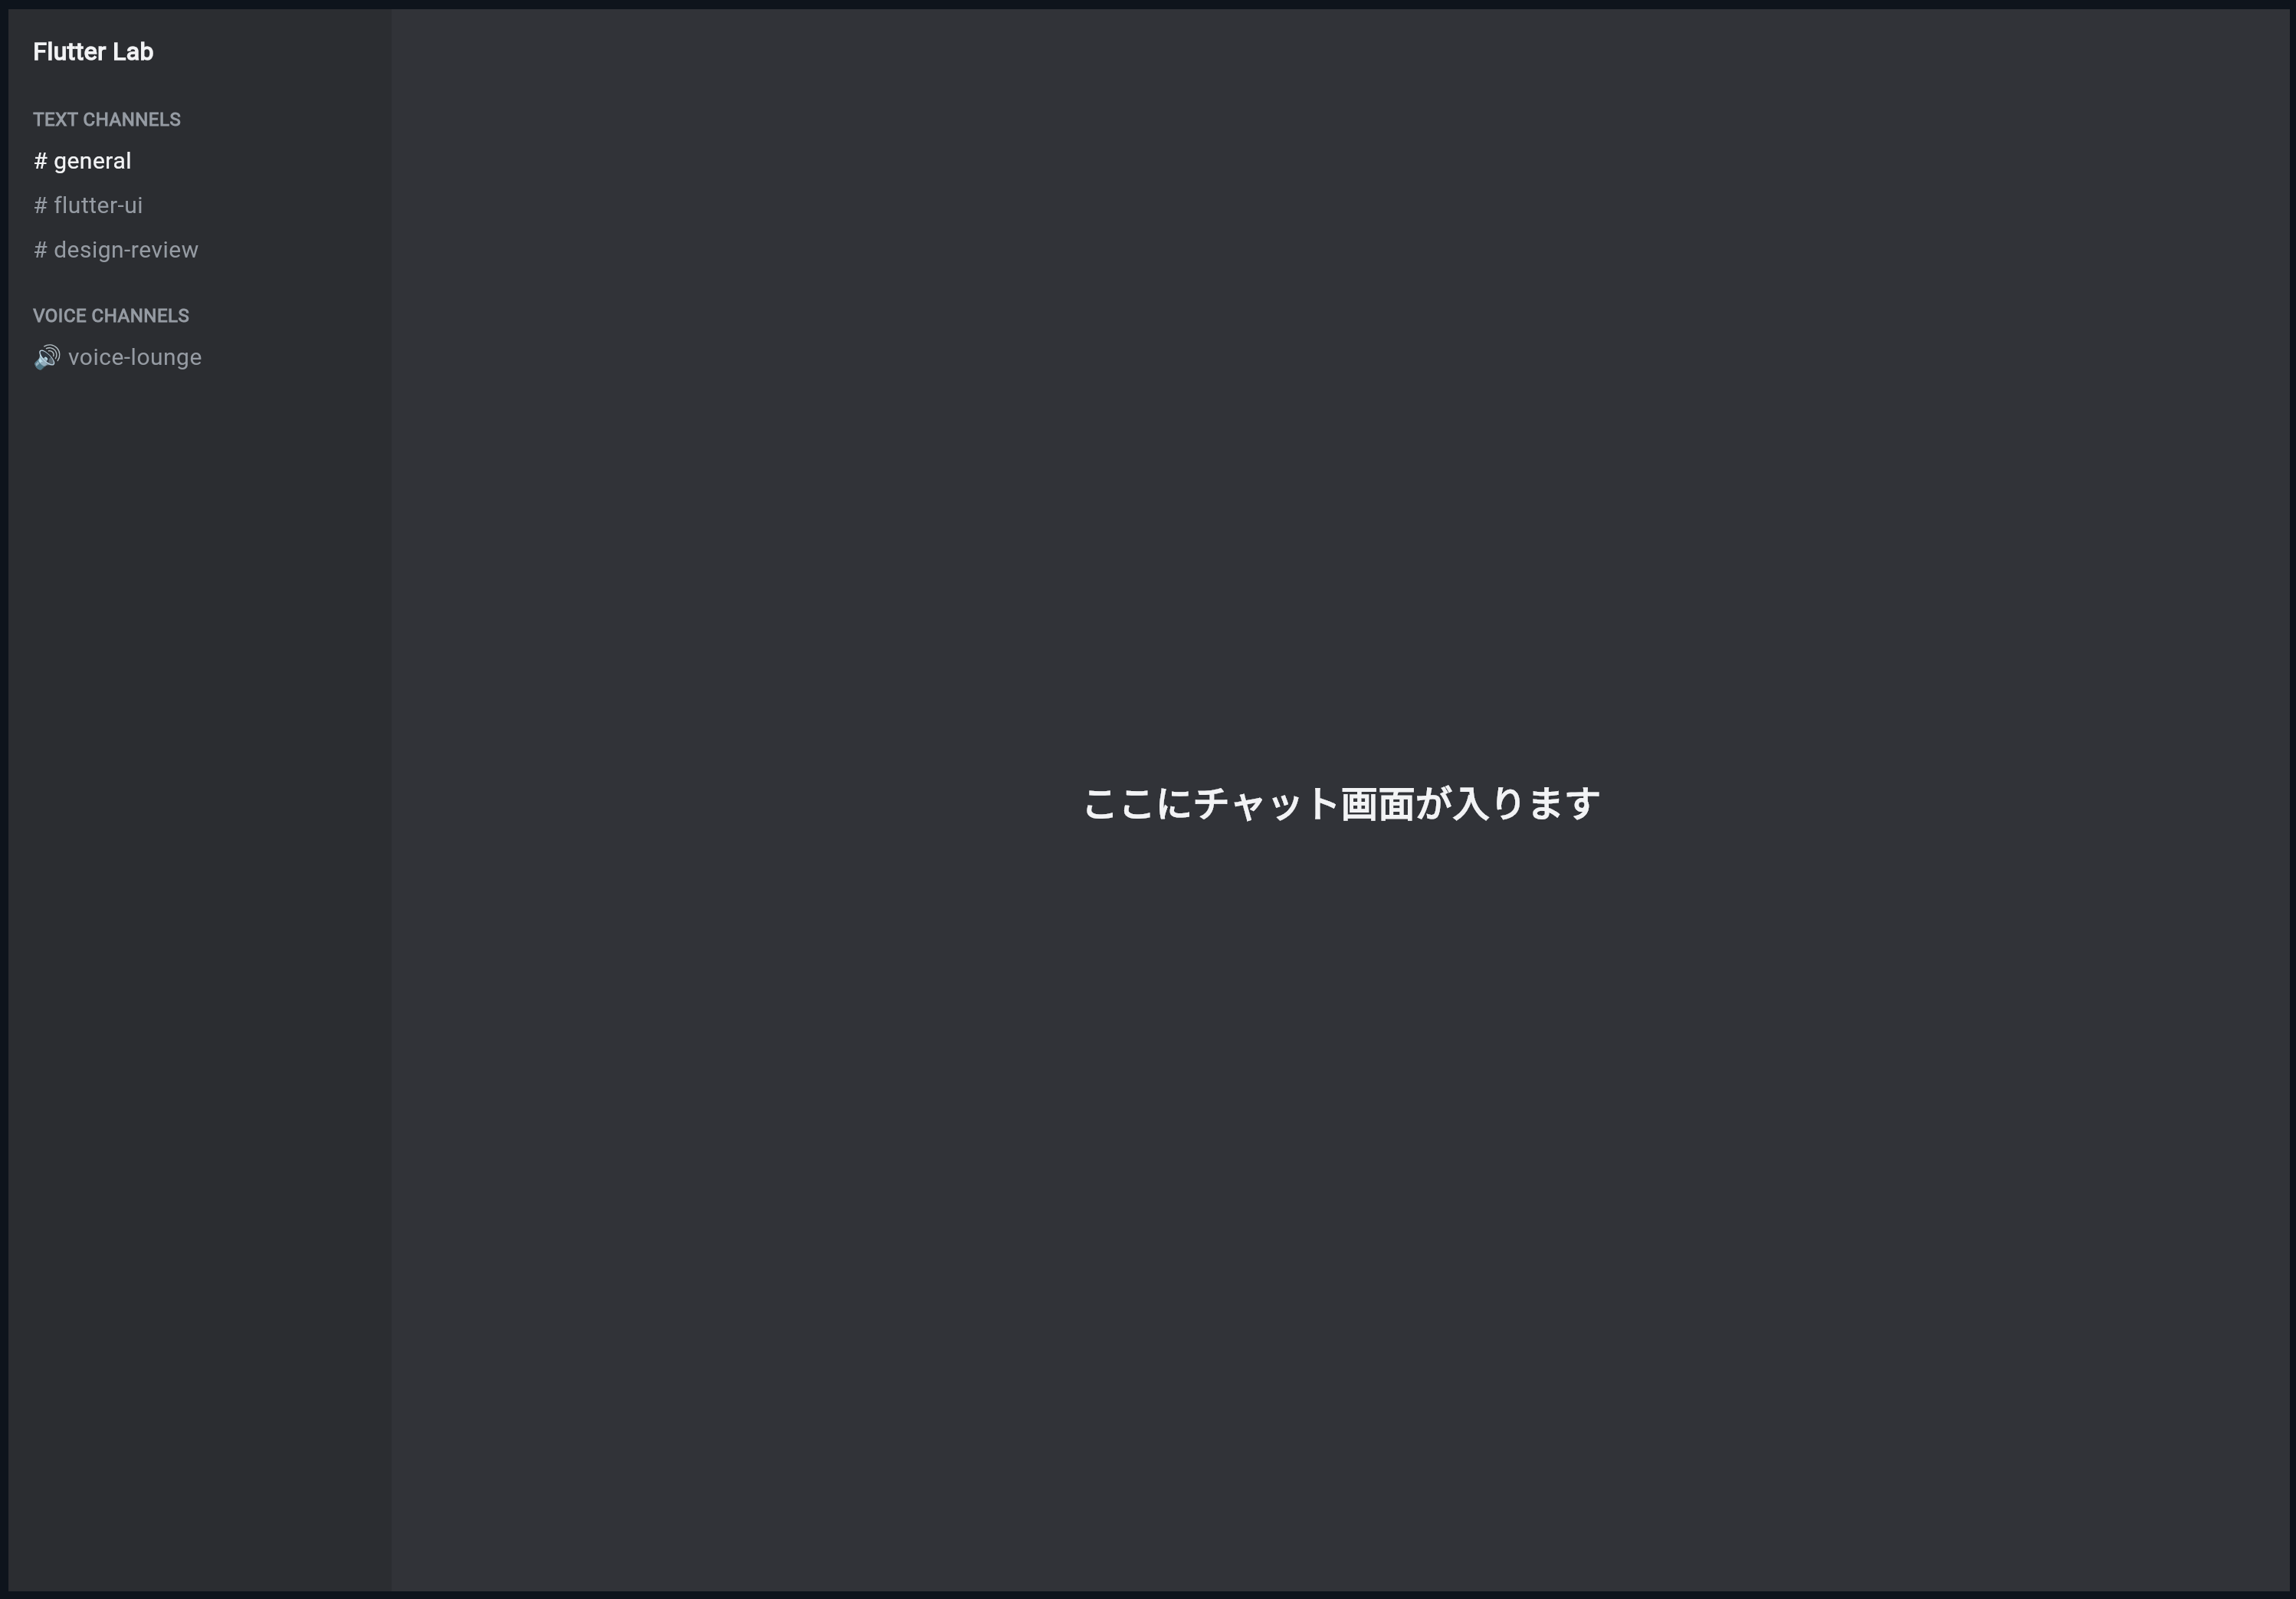
実行すると、左側にDiscord風のチャンネル一覧が表示されます。
Flutter Lab

TEXT CHANNELS
# general
# flutter-ui
# design-review

VOICE CHANNELS
🔊 voice-lounge
まだ本格的な部品化はしていませんが、チャンネル一覧の雰囲気は見えてきました。
この段階で理解してほしいのは、チャンネル一覧は基本的に縦並びだということです。
ChannelSidebar
↓
Columnで縦に並べる
ChannelCategoryを作る
次に、TEXT CHANNELS や VOICE CHANNELS の部分を部品化します。
この見出しは、何度も使う可能性があります。
TEXT CHANNELS
VOICE CHANNELS
そこで、ChannelCategory というWidgetを作ります。
class ChannelCategory extends StatelessWidget {
  const ChannelCategory({
    super.key,
    required this.title,
  });

  final String title;

  @override
  Widget build(BuildContext context) {
    return Padding(
      padding: const EdgeInsets.fromLTRB(
        DiscordSpacing.lg,
        DiscordSpacing.md,
        DiscordSpacing.sm,
        DiscordSpacing.sm,
      ),
      child: Row(
        children: [
          const Icon(
            Icons.keyboard_arrow_down_rounded,
            color: DiscordColors.textMuted,
            size: 16,
          ),
          Expanded(
            child: Text(
              title,
              overflow: TextOverflow.ellipsis,
              style: const TextStyle(
                color: DiscordColors.textMuted,
                fontSize: 12,
                fontWeight: FontWeight.bold,
                letterSpacing: 0.4,
              ),
            ),
          ),
          const Icon(
            Icons.add_rounded,
            color: DiscordColors.textMuted,
            size: 18,
          ),
        ],
      ),
    );
  }
}
ChannelCategoryの構造
ChannelCategory の中身は、Row です。
ChannelCategory
└─ Row
   ├─ 下向き矢印
   ├─ カテゴリ名
   └─ 追加アイコン
Discord風のチャンネルカテゴリには、左に開閉アイコン、右に追加アイコンがあることが多いです。
今回は、実際の開閉機能や追加機能はまだ作りません。
見た目だけ作ります。
機能はまだなし
↓
見た目を先に作る
この進め方は大切です。
最初から機能まで全部作ろうとすると難しくなるため、まずUIだけ作ります。
ChannelTileを作る
次に、チャンネル1つ分を表示する ChannelTile を作ります。
チャンネル1つ分には、次の要素があります。
アイコン
チャンネル名
未読マーク
選択中の背景
まずは、ChannelTile の完成形を見てみます。
class ChannelTile extends StatelessWidget {
  const ChannelTile({
    super.key,
    required this.channel,
    required this.selected,
    required this.onTap,
  });

  final DiscordChannel channel;
  final bool selected;
  final VoidCallback onTap;

  @override
  Widget build(BuildContext context) {
    final icon = channel.type == ChannelType.text
        ? Icons.tag_rounded
        : Icons.volume_up_rounded;

    return GestureDetector(
      onTap: onTap,
      child: Container(
        margin: const EdgeInsets.symmetric(
          horizontal: DiscordSpacing.sm,
          vertical: DiscordSpacing.xs,
        ),
        padding: const EdgeInsets.symmetric(
          horizontal: DiscordSpacing.sm,
          vertical: DiscordSpacing.sm,
        ),
        decoration: BoxDecoration(
          color: selected ? DiscordColors.selected : Colors.transparent,
          borderRadius: BorderRadius.circular(DiscordRadius.sm),
        ),
        child: Row(
          children: [
            Icon(
              icon,
              color: selected
                  ? DiscordColors.textPrimary
                  : DiscordColors.textMuted,
              size: 20,
            ),
            const SizedBox(width: DiscordSpacing.sm),
            Expanded(
              child: Text(
                channel.name,
                overflow: TextOverflow.ellipsis,
                style: TextStyle(
                  color: selected
                      ? DiscordColors.textPrimary
                      : DiscordColors.textMuted,
                  fontSize: 15,
                  fontWeight: channel.unread ? FontWeight.bold : FontWeight.w500,
                ),
              ),
            ),
            if (channel.unread)
              Container(
                width: 8,
                height: 8,
                decoration: const BoxDecoration(
                  color: DiscordColors.textPrimary,
                  shape: BoxShape.circle,
                ),
              ),
          ],
        ),
      ),
    );
  }
}
ChannelTileの中でやっていること
ChannelTile では、次のことをしています。
チャンネルの種類によってアイコンを変える
選択中なら背景色をつける
選択中なら文字色を明るくする
未読なら右側に小さな丸を出す
タップできるようにする
つまり、チャンネル1つ分の見た目と操作をまとめています。
ChannelTile
↓
チャンネル1つ分のUI
チャンネルの種類でアイコンを変える
次の部分を見てください。
final icon = channel.type == ChannelType.text
    ? Icons.tag_rounded
    : Icons.volume_up_rounded;
これは、条件によって使うアイコンを変えています。
channel.type が text
↓
# のようなアイコン

それ以外
↓
音声アイコン
ここで使っている ? : は、条件によって値を変える書き方です。
初心者向けには、次のように理解してください。
条件 ? trueのときの値 : falseのときの値
今回の場合は、次のような意味です。
テキストチャンネルならタグアイコン
そうでなければ音声アイコン
選択中の見た目を変える
選択中かどうかは、selected という bool で受け取ります。
final bool selected;
selected が true なら、背景色をつけます。
color: selected ? DiscordColors.selected : Colors.transparent
意味は次の通りです。
selectedがtrue
↓
DiscordColors.selected

selectedがfalse
↓
透明
文字色も同じように変えます。
color: selected
    ? DiscordColors.textPrimary
    : DiscordColors.textMuted
このように、状態によって見た目を変えることができます。
GestureDetectorでタップできるようにする
ChannelTile 全体をタップできるようにするために、GestureDetector を使っています。
GestureDetector(
  onTap: onTap,
  child: Container(...),
)
onTap は、タップされたときに実行する処理です。
チャンネルをタップ
↓
onTapが実行される
↓
選択中チャンネルが変わる
このあと、親Widgetで selectedChannelIndex を持ち、タップされたら変更するようにします。
チャンネル一覧にデータを使う
ここからは、固定の文字ではなく、channels のデータからチャンネル一覧を作ります。
まず、enum と class と channels を追加します。
enum ChannelType {
  text,
  voice,
}

class DiscordChannel {
  const DiscordChannel({
    required this.name,
    required this.type,
    this.unread = false,
  });

  final String name;
  final ChannelType type;
  final bool unread;
}

const channels = [
  DiscordChannel(name: 'general', type: ChannelType.text),
  DiscordChannel(name: 'flutter-ui', type: ChannelType.text),
  DiscordChannel(name: 'design-review', type: ChannelType.text),
  DiscordChannel(
    name: 'announcements',
    type: ChannelType.text,
    unread: true,
  ),
  DiscordChannel(name: 'voice-lounge', type: ChannelType.voice),
  DiscordChannel(name: 'pair-programming', type: ChannelType.voice),
];
これで、チャンネル一覧の元データができました。
テキストチャンネルだけ取り出す
channels の中には、テキストチャンネルとボイスチャンネルが混ざっています。
general → text
flutter-ui → text
voice-lounge → voice
表示するときは、まずテキストチャンネルだけ、次にボイスチャンネルだけを分けて表示したいです。
そのために、where を使います。
final textChannels = channels
    .asMap()
    .entries
    .where((entry) => entry.value.type == ChannelType.text)
    .toList();
初心者には少し難しいので、分解します。
whereとは何か
where は、Listの中から条件に合うものだけを取り出す処理です。
初心者向けには、次のように理解してください。
where = 条件に合うデータだけを選ぶ
たとえば、チャンネルの中からテキストチャンネルだけを選ぶなら、次のようなイメージです。
channels
├─ general / text → 残す
├─ flutter-ui / text → 残す
├─ voice-lounge / voice → 除く
└─ pair-programming / voice → 除く
コードでは、次の部分が条件です。
entry.value.type == ChannelType.text
これは、
チャンネルのtypeがtextなら残す
という意味です。
asMapとentriesとは何か
今回の教材では、チャンネルの番号も必要です。
なぜなら、選択中チャンネルを selectedChannelIndex で管理するからです。
0番目 general
1番目 flutter-ui
2番目 design-review
asMap().entries を使うと、index番号とデータをセットで扱えます。
channels.asMap().entries
初心者向けには、次のように理解してください。
asMap().entries
↓
Listの番号と中身を一緒に取り出す
たとえば、次のようなイメージです。
0 → general
1 → flutter-ui
2 → design-review
少し難しいですが、ここでは「番号も一緒に使いたいから書いている」と理解できれば大丈夫です。
ChannelSidebarをStatefulWidgetにする
チャンネルをタップしたら、選択中チャンネルを変えたいです。
そのため、selectedChannelIndex という状態を持ちます。
今回は練習用として、ChannelSidebarPracticePage に状態を持たせます。
class ChannelSidebarPracticePage extends StatefulWidget {
  const ChannelSidebarPracticePage({super.key});

  @override
  State<ChannelSidebarPracticePage> createState() =>
      _ChannelSidebarPracticePageState();
}

class _ChannelSidebarPracticePageState
    extends State<ChannelSidebarPracticePage> {
  int selectedChannelIndex = 0;

  void selectChannel(int index) {
    setState(() {
      selectedChannelIndex = index;
    });
  }

  @override
  Widget build(BuildContext context) {
    return Scaffold(
      body: Row(
        children: [
          SizedBox(
            width: 250,
            child: ChannelSidebar(
              selectedChannelIndex: selectedChannelIndex,
              onChannelSelected: selectChannel,
            ),
          ),
          Expanded(
            child: Center(
              child: Text(
                '選択中: #${channels[selectedChannelIndex].name}',
                style: const TextStyle(
                  color: DiscordColors.textPrimary,
                  fontSize: 24,
                  fontWeight: FontWeight.bold,
                ),
              ),
            ),
          ),
        ],
      ),
    );
  }
}
selectedChannelIndexとは何か
selectedChannelIndex は、現在選択しているチャンネルの番号です。
int selectedChannelIndex = 0;
これは、最初は0番目のチャンネルを選択するという意味です。
selectedChannelIndex = 0
↓
general

selectedChannelIndex = 1
↓
flutter-ui

selectedChannelIndex = 2
↓
design-review
この番号を変えることで、選択中のチャンネルを切り替えます。
setStateで選択を更新する
チャンネルが選ばれたら、setState で状態を変えます。
void selectChannel(int index) {
  setState(() {
    selectedChannelIndex = index;
  });
}
setState は、状態を変更して画面を更新するためのものです。
初心者向けには、次のように理解してください。
setState
↓
値を変えたので、画面を描き直してください
このあと、selectedChannelIndex が変わり、選択中の背景色も変わります。
ChannelSidebarに値と処理を渡す
ChannelSidebar には、選択中の番号と、選択されたときの処理を渡します。
ChannelSidebar(
  selectedChannelIndex: selectedChannelIndex,
  onChannelSelected: selectChannel,
)
ChannelSidebar 側では、次のように受け取ります。
class ChannelSidebar extends StatelessWidget {
  const ChannelSidebar({
    super.key,
    required this.selectedChannelIndex,
    required this.onChannelSelected,
  });

  final int selectedChannelIndex;
  final ValueChanged<int> onChannelSelected;
}
ValueChanged<int> は、intの値を受け取る関数です。
今回の場合は、タップされたチャンネル番号を受け取ります。
ChannelTileをタップ
↓
onChannelSelected(index)
↓
親のselectedChannelIndexが変わる
ChannelSidebarの完成形
ChannelSidebar は、次のようになります。
class ChannelSidebar extends StatelessWidget {
  const ChannelSidebar({
    super.key,
    required this.selectedChannelIndex,
    required this.onChannelSelected,
  });

  final int selectedChannelIndex;
  final ValueChanged<int> onChannelSelected;

  @override
  Widget build(BuildContext context) {
    final textChannels = channels
        .asMap()
        .entries
        .where((entry) => entry.value.type == ChannelType.text)
        .toList();

    final voiceChannels = channels
        .asMap()
        .entries
        .where((entry) => entry.value.type == ChannelType.voice)
        .toList();

    return Container(
      color: DiscordColors.sidebar,
      child: Column(
        children: [
          Container(
            height: 52,
            padding: const EdgeInsets.symmetric(
              horizontal: DiscordSpacing.lg,
            ),
            decoration: const BoxDecoration(
              color: DiscordColors.sidebar,
              boxShadow: [
                BoxShadow(
                  color: Colors.black26,
                  offset: Offset(0, 1),
                  blurRadius: 2,
                ),
              ],
            ),
            child: const Row(
              children: [
                Expanded(
                  child: Text(
                    'Flutter Lab',
                    overflow: TextOverflow.ellipsis,
                    style: TextStyle(
                      color: DiscordColors.textPrimary,
                      fontSize: 15,
                      fontWeight: FontWeight.bold,
                    ),
                  ),
                ),
                Icon(
                  Icons.keyboard_arrow_down_rounded,
                  color: DiscordColors.textPrimary,
                  size: 22,
                ),
              ],
            ),
          ),
          Expanded(
            child: ListView(
              padding: const EdgeInsets.fromLTRB(
                DiscordSpacing.sm,
                DiscordSpacing.md,
                DiscordSpacing.sm,
                DiscordSpacing.sm,
              ),
              children: [
                const ChannelCategory(title: 'TEXT CHANNELS'),
                ...textChannels.map(
                  (entry) => ChannelTile(
                    channel: entry.value,
                    selected: selectedChannelIndex == entry.key,
                    onTap: () => onChannelSelected(entry.key),
                  ),
                ),
                const SizedBox(height: DiscordSpacing.lg),
                const ChannelCategory(title: 'VOICE CHANNELS'),
                ...voiceChannels.map(
                  (entry) => ChannelTile(
                    channel: entry.value,
                    selected: selectedChannelIndex == entry.key,
                    onTap: () => onChannelSelected(entry.key),
                  ),
                ),
              ],
            ),
          ),
        ],
      ),
    );
  }
}
…mapとは何か
ここで、次のような書き方が出てきました。
...textChannels.map(
  (entry) => ChannelTile(...),
),
map は、Listの中身を別の形に変換する処理です。
初心者向けには、次のように理解してください。
map
↓
データをWidgetに変える
今回の場合は、チャンネルデータを ChannelTile に変換しています。
DiscordChannel
↓
ChannelTile
... は、作ったWidgetのListを children の中に展開するための記号です。
初心者向けには、次のように理解してください。
...map
↓
複数のWidgetをchildrenの中に並べる書き方
ここまでの完成コード

ここまでの内容をまとめたコードです。
import 'package:flutter/material.dart';

void main() {
  runApp(const ChannelSidebarPracticeApp());
}

class ChannelSidebarPracticeApp extends StatelessWidget {
  const ChannelSidebarPracticeApp({super.key});

  @override
  Widget build(BuildContext context) {
    return MaterialApp(
      title: 'Channel Sidebar Practice',
      debugShowCheckedModeBanner: false,
      theme: ThemeData(
        brightness: Brightness.dark,
        scaffoldBackgroundColor: DiscordColors.background,
      ),
      home: const ChannelSidebarPracticePage(),
    );
  }
}

class DiscordColors {
  static const Color sidebar = Color(0xFF2B2D31);
  static const Color background = Color(0xFF313338);
  static const Color selected = Color(0xFF404249);
  static const Color hover = Color(0xFF35373C);
  static const Color textPrimary = Color(0xFFF2F3F5);
  static const Color textMuted = Color(0xFF949BA4);
}

class DiscordSpacing {
  static const double xs = 4;
  static const double sm = 8;
  static const double md = 12;
  static const double lg = 16;
}

class DiscordRadius {
  static const double sm = 6;
}

enum ChannelType {
  text,
  voice,
}

class DiscordChannel {
  const DiscordChannel({
    required this.name,
    required this.type,
    this.unread = false,
  });

  final String name;
  final ChannelType type;
  final bool unread;
}

const channels = [
  DiscordChannel(name: 'general', type: ChannelType.text),
  DiscordChannel(name: 'flutter-ui', type: ChannelType.text),
  DiscordChannel(name: 'design-review', type: ChannelType.text),
  DiscordChannel(
    name: 'announcements',
    type: ChannelType.text,
    unread: true,
  ),
  DiscordChannel(name: 'voice-lounge', type: ChannelType.voice),
  DiscordChannel(name: 'pair-programming', type: ChannelType.voice),
];

class ChannelSidebarPracticePage extends StatefulWidget {
  const ChannelSidebarPracticePage({super.key});

  @override
  State<ChannelSidebarPracticePage> createState() =>
      _ChannelSidebarPracticePageState();
}

class _ChannelSidebarPracticePageState
    extends State<ChannelSidebarPracticePage> {
  int selectedChannelIndex = 0;

  void selectChannel(int index) {
    setState(() {
      selectedChannelIndex = index;
    });
  }

  @override
  Widget build(BuildContext context) {
    return Scaffold(
      backgroundColor: DiscordColors.background,
      body: Row(
        children: [
          SizedBox(
            width: 250,
            child: ChannelSidebar(
              selectedChannelIndex: selectedChannelIndex,
              onChannelSelected: selectChannel,
            ),
          ),
          Expanded(
            child: Center(
              child: Text(
                '選択中: #${channels[selectedChannelIndex].name}',
                style: const TextStyle(
                  color: DiscordColors.textPrimary,
                  fontSize: 24,
                  fontWeight: FontWeight.bold,
                ),
              ),
            ),
          ),
        ],
      ),
    );
  }
}

class ChannelSidebar extends StatelessWidget {
  const ChannelSidebar({
    super.key,
    required this.selectedChannelIndex,
    required this.onChannelSelected,
  });

  final int selectedChannelIndex;
  final ValueChanged<int> onChannelSelected;

  @override
  Widget build(BuildContext context) {
    final textChannels = channels
        .asMap()
        .entries
        .where((entry) => entry.value.type == ChannelType.text)
        .toList();

    final voiceChannels = channels
        .asMap()
        .entries
        .where((entry) => entry.value.type == ChannelType.voice)
        .toList();

    return Container(
      color: DiscordColors.sidebar,
      child: Column(
        children: [
          Container(
            height: 52,
            padding: const EdgeInsets.symmetric(
              horizontal: DiscordSpacing.lg,
            ),
            decoration: const BoxDecoration(
              color: DiscordColors.sidebar,
              boxShadow: [
                BoxShadow(
                  color: Colors.black26,
                  offset: Offset(0, 1),
                  blurRadius: 2,
                ),
              ],
            ),
            child: const Row(
              children: [
                Expanded(
                  child: Text(
                    'Flutter Lab',
                    overflow: TextOverflow.ellipsis,
                    style: TextStyle(
                      color: DiscordColors.textPrimary,
                      fontSize: 15,
                      fontWeight: FontWeight.bold,
                    ),
                  ),
                ),
                Icon(
                  Icons.keyboard_arrow_down_rounded,
                  color: DiscordColors.textPrimary,
                  size: 22,
                ),
              ],
            ),
          ),
          Expanded(
            child: ListView(
              padding: const EdgeInsets.fromLTRB(
                DiscordSpacing.sm,
                DiscordSpacing.md,
                DiscordSpacing.sm,
                DiscordSpacing.sm,
              ),
              children: [
                const ChannelCategory(title: 'TEXT CHANNELS'),
                ...textChannels.map(
                  (entry) => ChannelTile(
                    channel: entry.value,
                    selected: selectedChannelIndex == entry.key,
                    onTap: () => onChannelSelected(entry.key),
                  ),
                ),
                const SizedBox(height: DiscordSpacing.lg),
                const ChannelCategory(title: 'VOICE CHANNELS'),
                ...voiceChannels.map(
                  (entry) => ChannelTile(
                    channel: entry.value,
                    selected: selectedChannelIndex == entry.key,
                    onTap: () => onChannelSelected(entry.key),
                  ),
                ),
              ],
            ),
          ),
        ],
      ),
    );
  }
}

class ChannelCategory extends StatelessWidget {
  const ChannelCategory({
    super.key,
    required this.title,
  });

  final String title;

  @override
  Widget build(BuildContext context) {
    return Padding(
      padding: const EdgeInsets.fromLTRB(
        DiscordSpacing.sm,
        DiscordSpacing.md,
        DiscordSpacing.sm,
        DiscordSpacing.sm,
      ),
      child: Row(
        children: [
          const Icon(
            Icons.keyboard_arrow_down_rounded,
            color: DiscordColors.textMuted,
            size: 16,
          ),
          Expanded(
            child: Text(
              title,
              overflow: TextOverflow.ellipsis,
              style: const TextStyle(
                color: DiscordColors.textMuted,
                fontSize: 12,
                fontWeight: FontWeight.bold,
                letterSpacing: 0.4,
              ),
            ),
          ),
          const Icon(
            Icons.add_rounded,
            color: DiscordColors.textMuted,
            size: 18,
          ),
        ],
      ),
    );
  }
}

class ChannelTile extends StatelessWidget {
  const ChannelTile({
    super.key,
    required this.channel,
    required this.selected,
    required this.onTap,
  });

  final DiscordChannel channel;
  final bool selected;
  final VoidCallback onTap;

  @override
  Widget build(BuildContext context) {
    final icon = channel.type == ChannelType.text
        ? Icons.tag_rounded
        : Icons.volume_up_rounded;

    return GestureDetector(
      onTap: onTap,
      child: Container(
        margin: const EdgeInsets.symmetric(
          horizontal: DiscordSpacing.xs,
          vertical: 1,
        ),
        padding: const EdgeInsets.symmetric(
          horizontal: DiscordSpacing.sm,
          vertical: DiscordSpacing.sm,
        ),
        decoration: BoxDecoration(
          color: selected ? DiscordColors.selected : Colors.transparent,
          borderRadius: BorderRadius.circular(DiscordRadius.sm),
        ),
        child: Row(
          children: [
            Icon(
              icon,
              color: selected
                  ? DiscordColors.textPrimary
                  : DiscordColors.textMuted,
              size: 20,
            ),
            const SizedBox(width: DiscordSpacing.sm),
            Expanded(
              child: Text(
                channel.name,
                overflow: TextOverflow.ellipsis,
                style: TextStyle(
                  color: selected
                      ? DiscordColors.textPrimary
                      : DiscordColors.textMuted,
                  fontSize: 15,
                  fontWeight:
                      channel.unread ? FontWeight.bold : FontWeight.w500,
                ),
              ),
            ),
            if (channel.unread)
              Container(
                width: 8,
                height: 8,
                decoration: const BoxDecoration(
                  color: DiscordColors.textPrimary,
                  shape: BoxShape.circle,
                ),
              ),
          ],
        ),
      ),
    );
  }
}
実行して確認すること
このコードを実行すると、Discord風のチャンネル一覧が表示されます。
確認するポイントは、次の通りです。
TEXT CHANNELSとVOICE CHANNELSに分かれている
テキストチャンネルには # 風のアイコンが出る
ボイスチャンネルには音声アイコンが出る
generalが選択中として背景色付きで表示される
announcementsには未読マークが出る
チャンネルをタップすると選択中が変わる
中央のテキストも選択中チャンネル名に変わる
この時点で、Discord風のチャンネル一覧UIにかなり近づきます。
hover風の見た目を追加する
PCでは、チャンネルにマウスを重ねたときに背景色が変わると、よりDiscordらしくなります。
そのためには、ChannelTile を StatefulWidget にして、MouseRegion を使います。
hovering = false
↓
通常

hovering = true
↓
マウスが重なっている
ChannelTile を次のように変更します。
class ChannelTile extends StatefulWidget {
  const ChannelTile({
    super.key,
    required this.channel,
    required this.selected,
    required this.onTap,
  });

  final DiscordChannel channel;
  final bool selected;
  final VoidCallback onTap;

  @override
  State<ChannelTile> createState() => _ChannelTileState();
}

class _ChannelTileState extends State<ChannelTile> {
  bool hovering = false;

  @override
  Widget build(BuildContext context) {
    final icon = widget.channel.type == ChannelType.text
        ? Icons.tag_rounded
        : Icons.volume_up_rounded;

    final active = widget.selected || hovering;

    return GestureDetector(
      onTap: widget.onTap,
      child: MouseRegion(
        onEnter: (_) {
          setState(() {
            hovering = true;
          });
        },
        onExit: (_) {
          setState(() {
            hovering = false;
          });
        },
        child: AnimatedContainer(
          duration: const Duration(milliseconds: 120),
          margin: const EdgeInsets.symmetric(
            horizontal: DiscordSpacing.xs,
            vertical: 1,
          ),
          padding: const EdgeInsets.symmetric(
            horizontal: DiscordSpacing.sm,
            vertical: DiscordSpacing.sm,
          ),
          decoration: BoxDecoration(
            color: widget.selected
                ? DiscordColors.selected
                : hovering
                    ? DiscordColors.hover
                    : Colors.transparent,
            borderRadius: BorderRadius.circular(DiscordRadius.sm),
          ),
          child: Row(
            children: [
              Icon(
                icon,
                color: active
                    ? DiscordColors.textPrimary
                    : DiscordColors.textMuted,
                size: 20,
              ),
              const SizedBox(width: DiscordSpacing.sm),
              Expanded(
                child: Text(
                  widget.channel.name,
                  overflow: TextOverflow.ellipsis,
                  style: TextStyle(
                    color: active
                        ? DiscordColors.textPrimary
                        : DiscordColors.textMuted,
                    fontSize: 15,
                    fontWeight:
                        widget.channel.unread ? FontWeight.bold : FontWeight.w500,
                  ),
                ),
              ),
              if (widget.channel.unread)
                Container(
                  width: 8,
                  height: 8,
                  decoration: const BoxDecoration(
                    color: DiscordColors.textPrimary,
                    shape: BoxShape.circle,
                  ),
                ),
            ],
          ),
        ),
      ),
    );
  }
}
AnimatedContainerとは何か
ここでは、Container ではなく AnimatedContainer を使っています。
AnimatedContainer(
  duration: const Duration(milliseconds: 120),
  decoration: BoxDecoration(
    color: ...
  ),
)
AnimatedContainer は、色やサイズなどが変わったときに、なめらかに変化させるWidgetです。
初心者向けには、次のように理解してください。
AnimatedContainer
↓
見た目の変化を少しなめらかにしてくれるContainer
チャンネルにマウスを重ねたとき、背景色がパッと変わるより、少しなめらかに変わるほうが自然です。
下部のユーザー情報を追加する
Discordのチャンネル一覧の下部には、自分のユーザー情報が表示されています。
flutter_dev
Flutter UIを制作中
マイク / ヘッドホン / 設定
この部分を簡易的に作ります。
class UserControlBar extends StatelessWidget {
  const UserControlBar({super.key});

  @override
  Widget build(BuildContext context) {
    return Container(
      height: 58,
      color: const Color(0xFF232428),
      padding: const EdgeInsets.symmetric(horizontal: DiscordSpacing.sm),
      child: Row(
        children: [
          Container(
            width: 36,
            height: 36,
            alignment: Alignment.center,
            decoration: const BoxDecoration(
              color: Color(0xFF5865F2),
              shape: BoxShape.circle,
            ),
            child: const Text(
              'FL',
              style: TextStyle(
                color: DiscordColors.textPrimary,
                fontWeight: FontWeight.bold,
              ),
            ),
          ),
          const SizedBox(width: DiscordSpacing.sm),
          const Expanded(
            child: Column(
              mainAxisAlignment: MainAxisAlignment.center,
              crossAxisAlignment: CrossAxisAlignment.start,
              children: [
                Text(
                  'flutter_dev',
                  overflow: TextOverflow.ellipsis,
                  style: TextStyle(
                    color: DiscordColors.textPrimary,
                    fontSize: 13,
                    fontWeight: FontWeight.bold,
                  ),
                ),
                Text(
                  'Flutter UIを制作中',
                  overflow: TextOverflow.ellipsis,
                  style: TextStyle(
                    color: DiscordColors.textMuted,
                    fontSize: 11,
                  ),
                ),
              ],
            ),
          ),
          const Icon(
            Icons.mic_rounded,
            color: DiscordColors.textMuted,
            size: 18,
          ),
          const SizedBox(width: DiscordSpacing.sm),
          const Icon(
            Icons.headphones_rounded,
            color: DiscordColors.textMuted,
            size: 18,
          ),
          const SizedBox(width: DiscordSpacing.sm),
          const Icon(
            Icons.settings_rounded,
            color: DiscordColors.textMuted,
            size: 18,
          ),
        ],
      ),
    );
  }
}
ChannelSidebarの下にUserControlBarを入れる
ChannelSidebar の最後に、UserControlBar を追加します。
return Container(
  color: DiscordColors.sidebar,
  child: Column(
    children: [
      サーバー名エリア,
      Expanded(
        child: ListView(...),
      ),
      const UserControlBar(),
    ],
  ),
);
Expanded を使うことで、チャンネル一覧部分が残りの高さを使い、下部のユーザー情報が一番下に固定されます。
ChannelSidebar
├─ サーバー名
├─ チャンネル一覧:Expanded
└─ 下部ユーザー情報
この構造は、実際のDiscord風UIに近いです。
手を動かす練習1:チャンネルを追加する
channels に次のチャンネルを追加してみましょう。
DiscordChannel(
  name: 'questions',
  type: ChannelType.text,
  unread: true,
),
保存すると、TEXT CHANNELS の中に questions が追加されます。
この練習で、データを追加するとUIも増えることを確認できます。
手を動かす練習2:ボイスチャンネルを追加する
次のボイスチャンネルを追加してみましょう。
DiscordChannel(
  name: 'meeting-room',
  type: ChannelType.voice,
),
保存すると、VOICE CHANNELS の中に表示されます。
type: ChannelType.voice にしているため、音声アイコンで表示されます。
手を動かす練習3:未読マークを外してみる
announcements の unread: true を消してみましょう。
DiscordChannel(
  name: 'announcements',
  type: ChannelType.text,
),
右側の小さな丸が消えます。
この練習で、bool unread によって表示が変わることを確認できます。
手を動かす練習4:選択中の色を変えてみる
DiscordColors.selected を探してください。
static const Color selected = Color(0xFF404249);
これを少し青紫に変えてみます。
static const Color selected = Color(0xFF454B78);
選択中チャンネルの背景色が変わります。
手を動かす練習5:hoverの色を変えてみる
DiscordColors.hover を探してください。
static const Color hover = Color(0xFF35373C);
これを少し明るくしてみます。
static const Color hover = Color(0xFF3A3D44);
PCでマウスを重ねたときの背景色が変わります。
よくあるつまずき1:テキストチャンネルとボイスチャンネルの分け方が分からない
今回のポイントは、type を使って分けていることです。
entry.value.type == ChannelType.text
これは、テキストチャンネルだけ取り出す条件です。
ボイスチャンネルは、次のように取り出します。
entry.value.type == ChannelType.voice
このように、データに種類を持たせておくと、表示を分けやすくなります。
よくあるつまずき2:asMap().entriesが難しい
asMap().entries は、index番号とデータを一緒に使いたいときに使います。
今回、選択中チャンネルを番号で管理しているため、indexが必要です。
entry.key
↓
index番号

entry.value
↓
チャンネルデータ
つまり、次のように考えれば大丈夫です。
entry.key = 何番目か
entry.value = そのチャンネルの中身
よくあるつまずき3:Expandedを入れ忘れて下部バーがずれる
ChannelSidebar の中で、チャンネル一覧部分に Expanded を使っています。
Expanded(
  child: ListView(...),
),
これがないと、下部のユーザー情報がうまく一番下に配置されないことがあります。
上:サーバー名
中央:チャンネル一覧を伸ばす
下:ユーザー情報
このようなレイアウトでは、中央部分を Expanded にするのが基本です。
よくあるつまずき4:hoverはスマホで確認できない
MouseRegion のhoverは、PCでマウスを使うときに分かりやすい機能です。
スマホではhoverがないため、確認しにくいです。
PC
↓
hoverが分かる

スマホ
↓
タップ操作が中心
スマホでは、選択中の背景色が変わることを確認してください。
よくあるつまずき5:文字がはみ出る
チャンネル名が長い場合、文字が横にはみ出ることがあります。
その対策として、Expanded と TextOverflow.ellipsis を使っています。
Expanded(
  child: Text(
    channel.name,
    overflow: TextOverflow.ellipsis,
  ),
)
これは、長い文字を省略表示するための書き方です。
very-long-channel-name-example
↓
very-long-channel...
Discord風UIのように横幅が決まっている場所では、とても重要です。
この節の確認問題
確認問題1
ChannelSidebar は何を担当するWidgetですか。
答え
Discord風アプリのチャンネル一覧全体を担当するWidgetです。
確認問題2
ChannelCategory は何を担当するWidgetですか。
答え
TEXT CHANNELS や VOICE CHANNELS のようなカテゴリ見出しを担当するWidgetです。
確認問題3
ChannelTile は何を担当するWidgetですか。
答え
general や voice-lounge など、チャンネル1つ分の表示を担当するWidgetです。
確認問題4
テキストチャンネルとボイスチャンネルの種類を表すために使ったものは何ですか。
答え
enum ChannelType です。
確認問題5
複数のチャンネルの中からテキストチャンネルだけを取り出すために使った処理は何ですか。
答え
where です。
確認問題6
チャンネルをタップしたときに選択中の番号を変更するために使ったものは何ですか。
答え
setState です。
確認問題7
長いチャンネル名がはみ出ないようにするために使った指定は何ですか。
答え
overflow: TextOverflow.ellipsis です。
この節のまとめ
この節では、Discord風アプリのチャンネル一覧UIを作りました。
作った主なWidgetは、次の3つです。
ChannelSidebar
ChannelCategory
ChannelTile
また、チャンネル1つ分のデータとして DiscordChannel classを作りました。
DiscordChannel
├─ name
├─ type
└─ unread
今回学んだ重要な流れは、次の通りです。
チャンネルデータをListで持つ
↓
typeでテキストチャンネルとボイスチャンネルに分ける
↓
ChannelCategoryで見出しを表示する
↓
ChannelTileでチャンネル1つ分を表示する
↓
タップされたらsetStateで選択中チャンネルを変える
この節で一番大切なのは、次の考え方です。
チャンネル一覧のようなUIは、カテゴリ見出しと1件分の項目Widgetに分けると、整理しながら作れる。
次の節では、Discord風アプリに必要なデータ設計をさらに整理し、サーバー、チャンネル、ユーザー、メッセージをclassで扱えるようにしていきます。